
Good day to everyone,
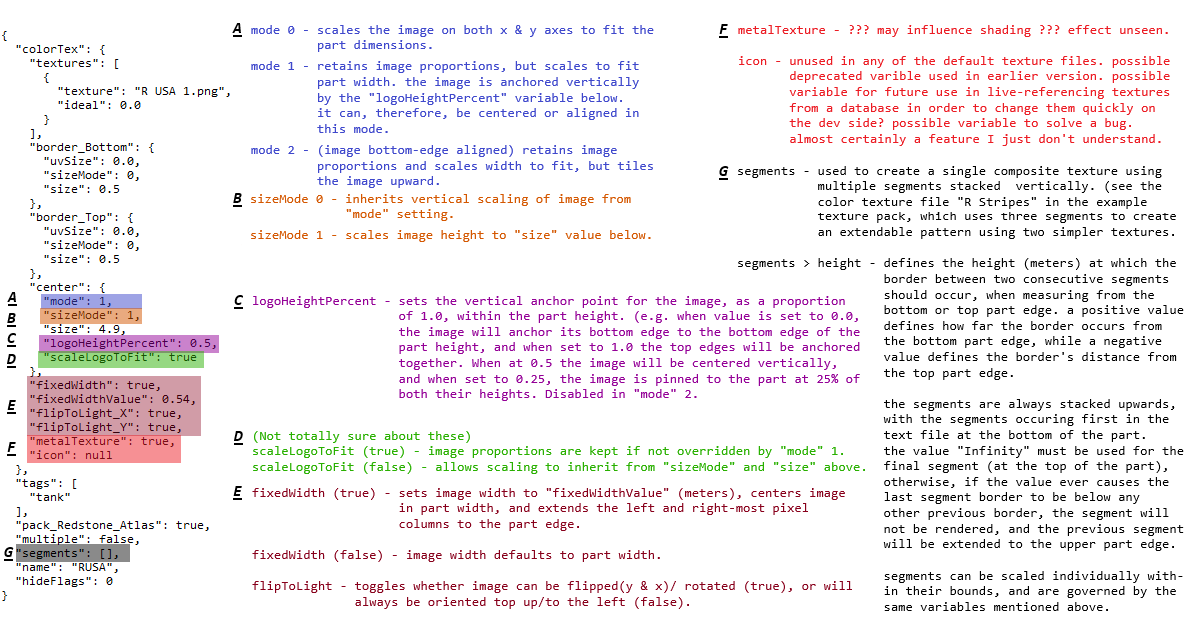
I posted this a moment ago in the discord server, and I thought I'd drop it here to for anyone who wants to use it. Plus it's easier to find on here! This is an explanation-board / study of all the wonderful variables you can alter when scaling a custom texture. These variables can be found in the color texture, shape texture, and shadow texture files, so just imagine the near-endless texture possibilities you can get from screwing with them all!!
Couldn't find this in the pins anywhere so my apologies if it has been done before. It took a bit of experimentation, but I had to make it for an upcoming texture project. Might provide a visual example sheet soon for each variable. Please excuse the dry-as-toast tone
Not sure if advanced custom texture editing will make much of a splash, but to whom it may concern, I hope this helps.
Cheers![[TEA]](data:image/gif;base64,R0lGODlhAQABAIAAAAAAAP///yH5BAEAAAAALAAAAAABAAEAAAIBRAA7 "Tea [TEA]")
I posted this a moment ago in the discord server, and I thought I'd drop it here to for anyone who wants to use it. Plus it's easier to find on here! This is an explanation-board / study of all the wonderful variables you can alter when scaling a custom texture. These variables can be found in the color texture, shape texture, and shadow texture files, so just imagine the near-endless texture possibilities you can get from screwing with them all!!
Couldn't find this in the pins anywhere so my apologies if it has been done before. It took a bit of experimentation, but I had to make it for an upcoming texture project. Might provide a visual example sheet soon for each variable. Please excuse the dry-as-toast tone
Not sure if advanced custom texture editing will make much of a splash, but to whom it may concern, I hope this helps.
Cheers