The Basics

Horus Lupercal

Primarch - Warmaster
Professor
Swingin' on a Star
Deja Vu
Biker Mice from Mars
ET phone home
Floater
Copycat
Registered
#51
Mission 2: 'Apollo' Moon Landing.

Next up on Basics FM, a return moon landing.

In this one, I'm going to concentrate on the specifics of this mission from orbit onwards
  • Selecting a target body
  • Transfer windows
  • Trans-Lunar Injection (TLI) burns
  • Encounters
  • Achieving Lunar Orbit
  • Powered Landings
  • Take Off from the Moon to LLO (Low Lunar Orbit)
  • Trans-Earth Injection (TEI)
  • Aerobraking
  • Atmosphere Entry and parachute landings
  • Mission Recovery
So, we'll take it now that after a fairly un-eventful launch, a bit of staging after 105.7 seconds

Screenshot_2019-03-29-00-57-55[1].png

Screenshot_2019-03-29-00-58-49.png

Screenshot_2019-03-29-00-58-51.png


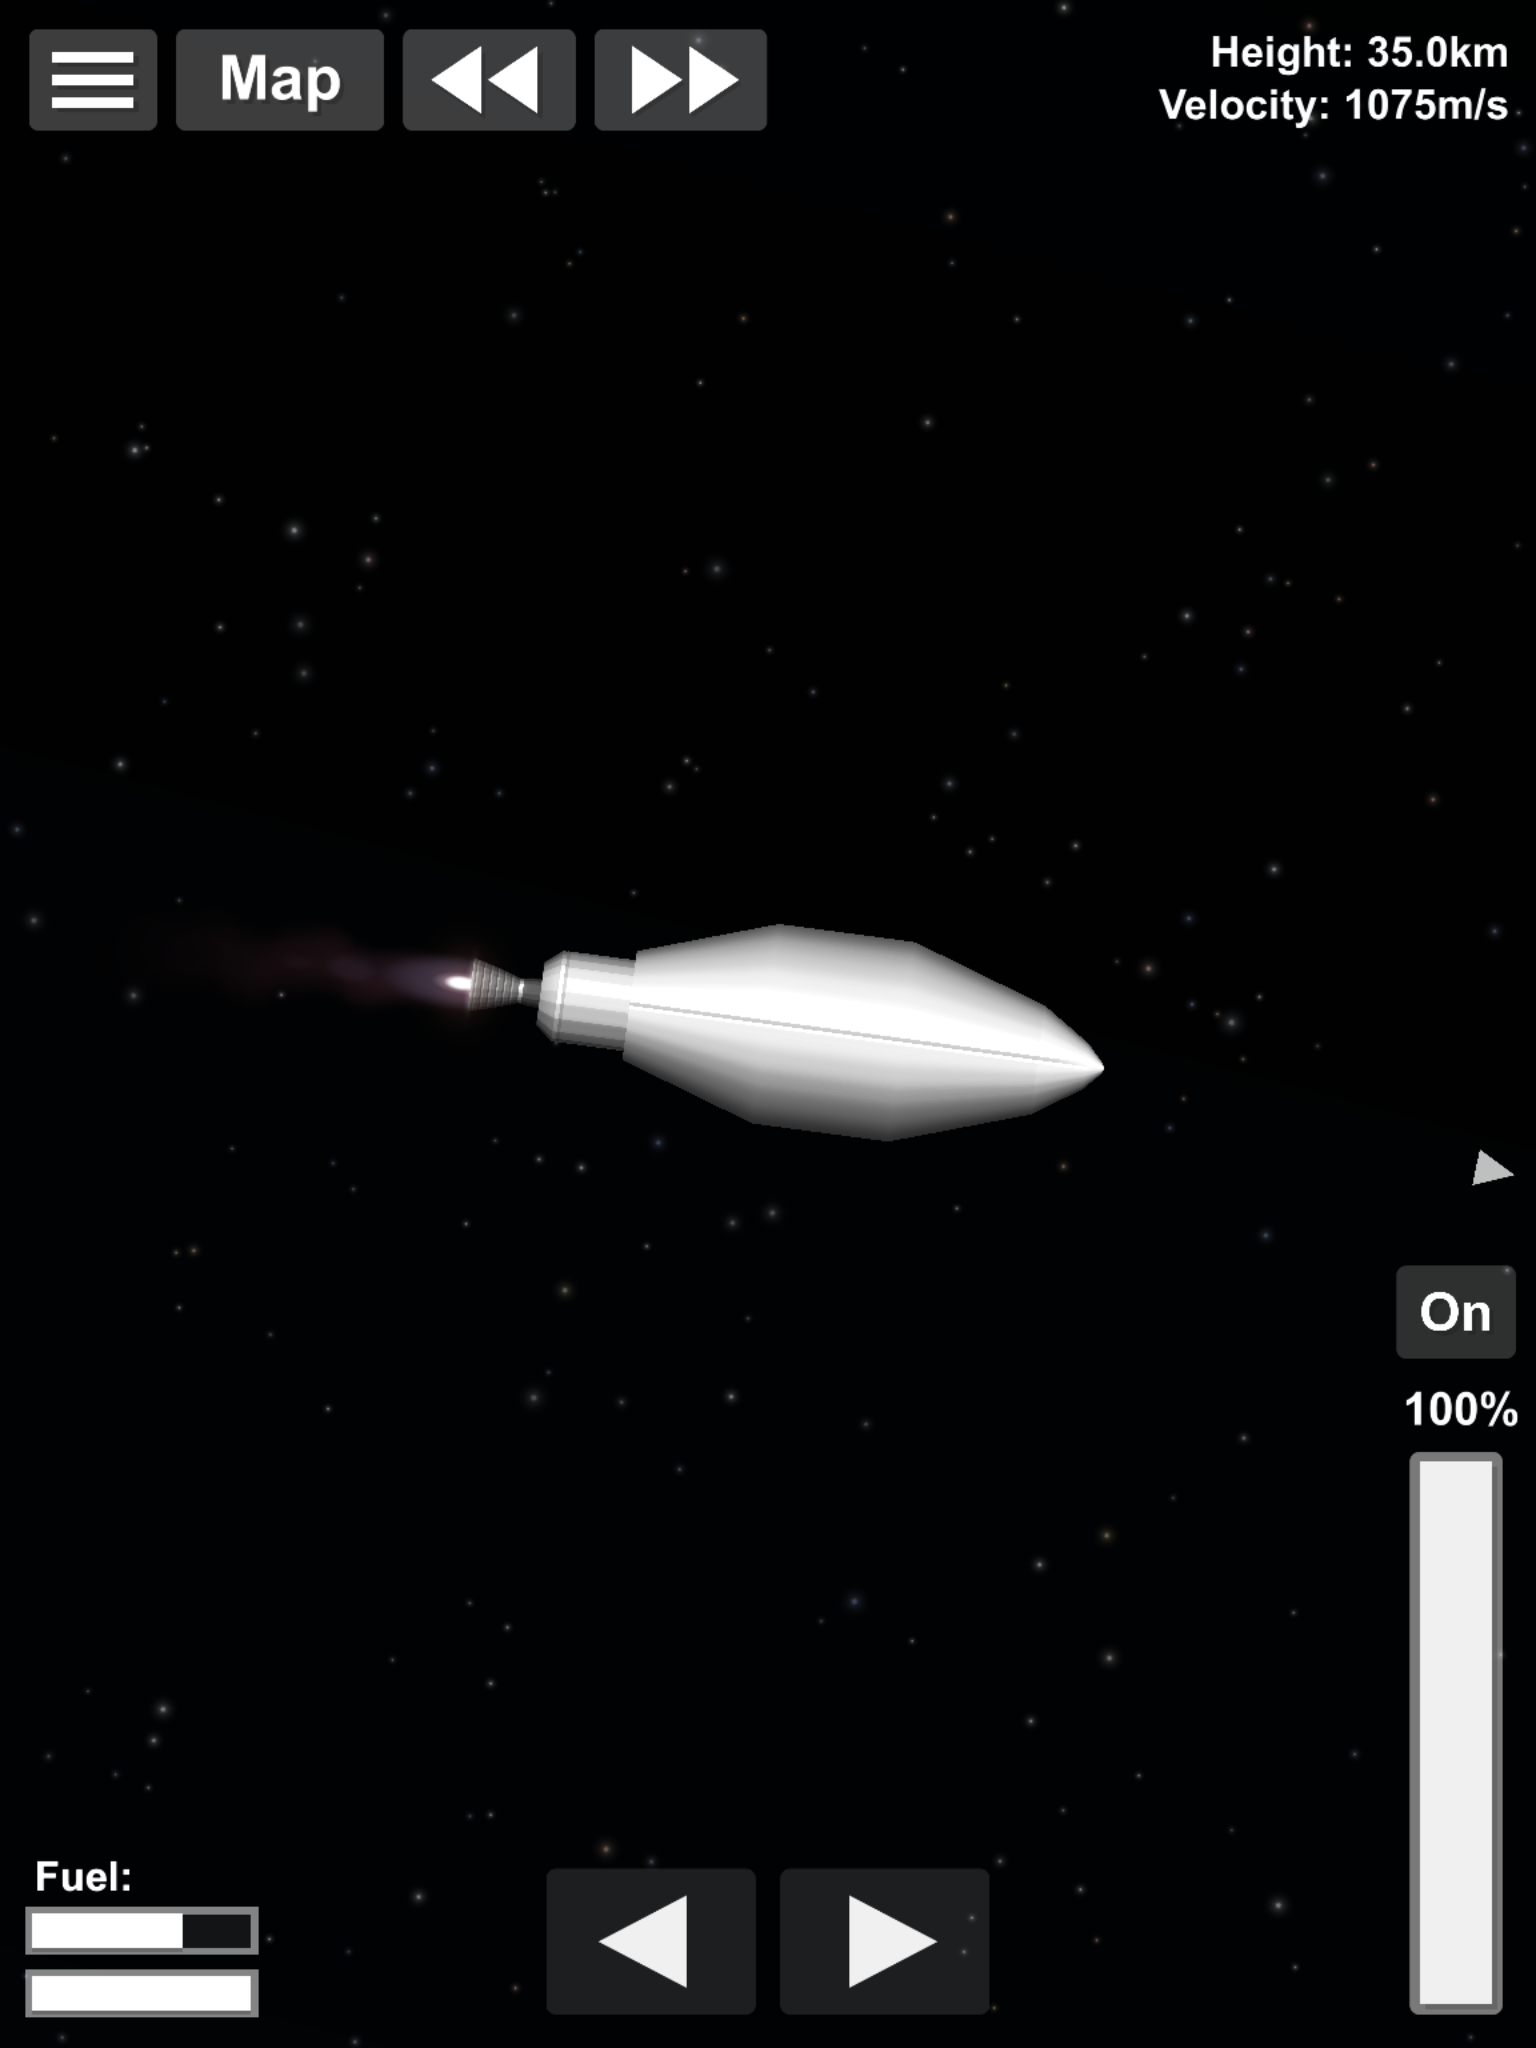
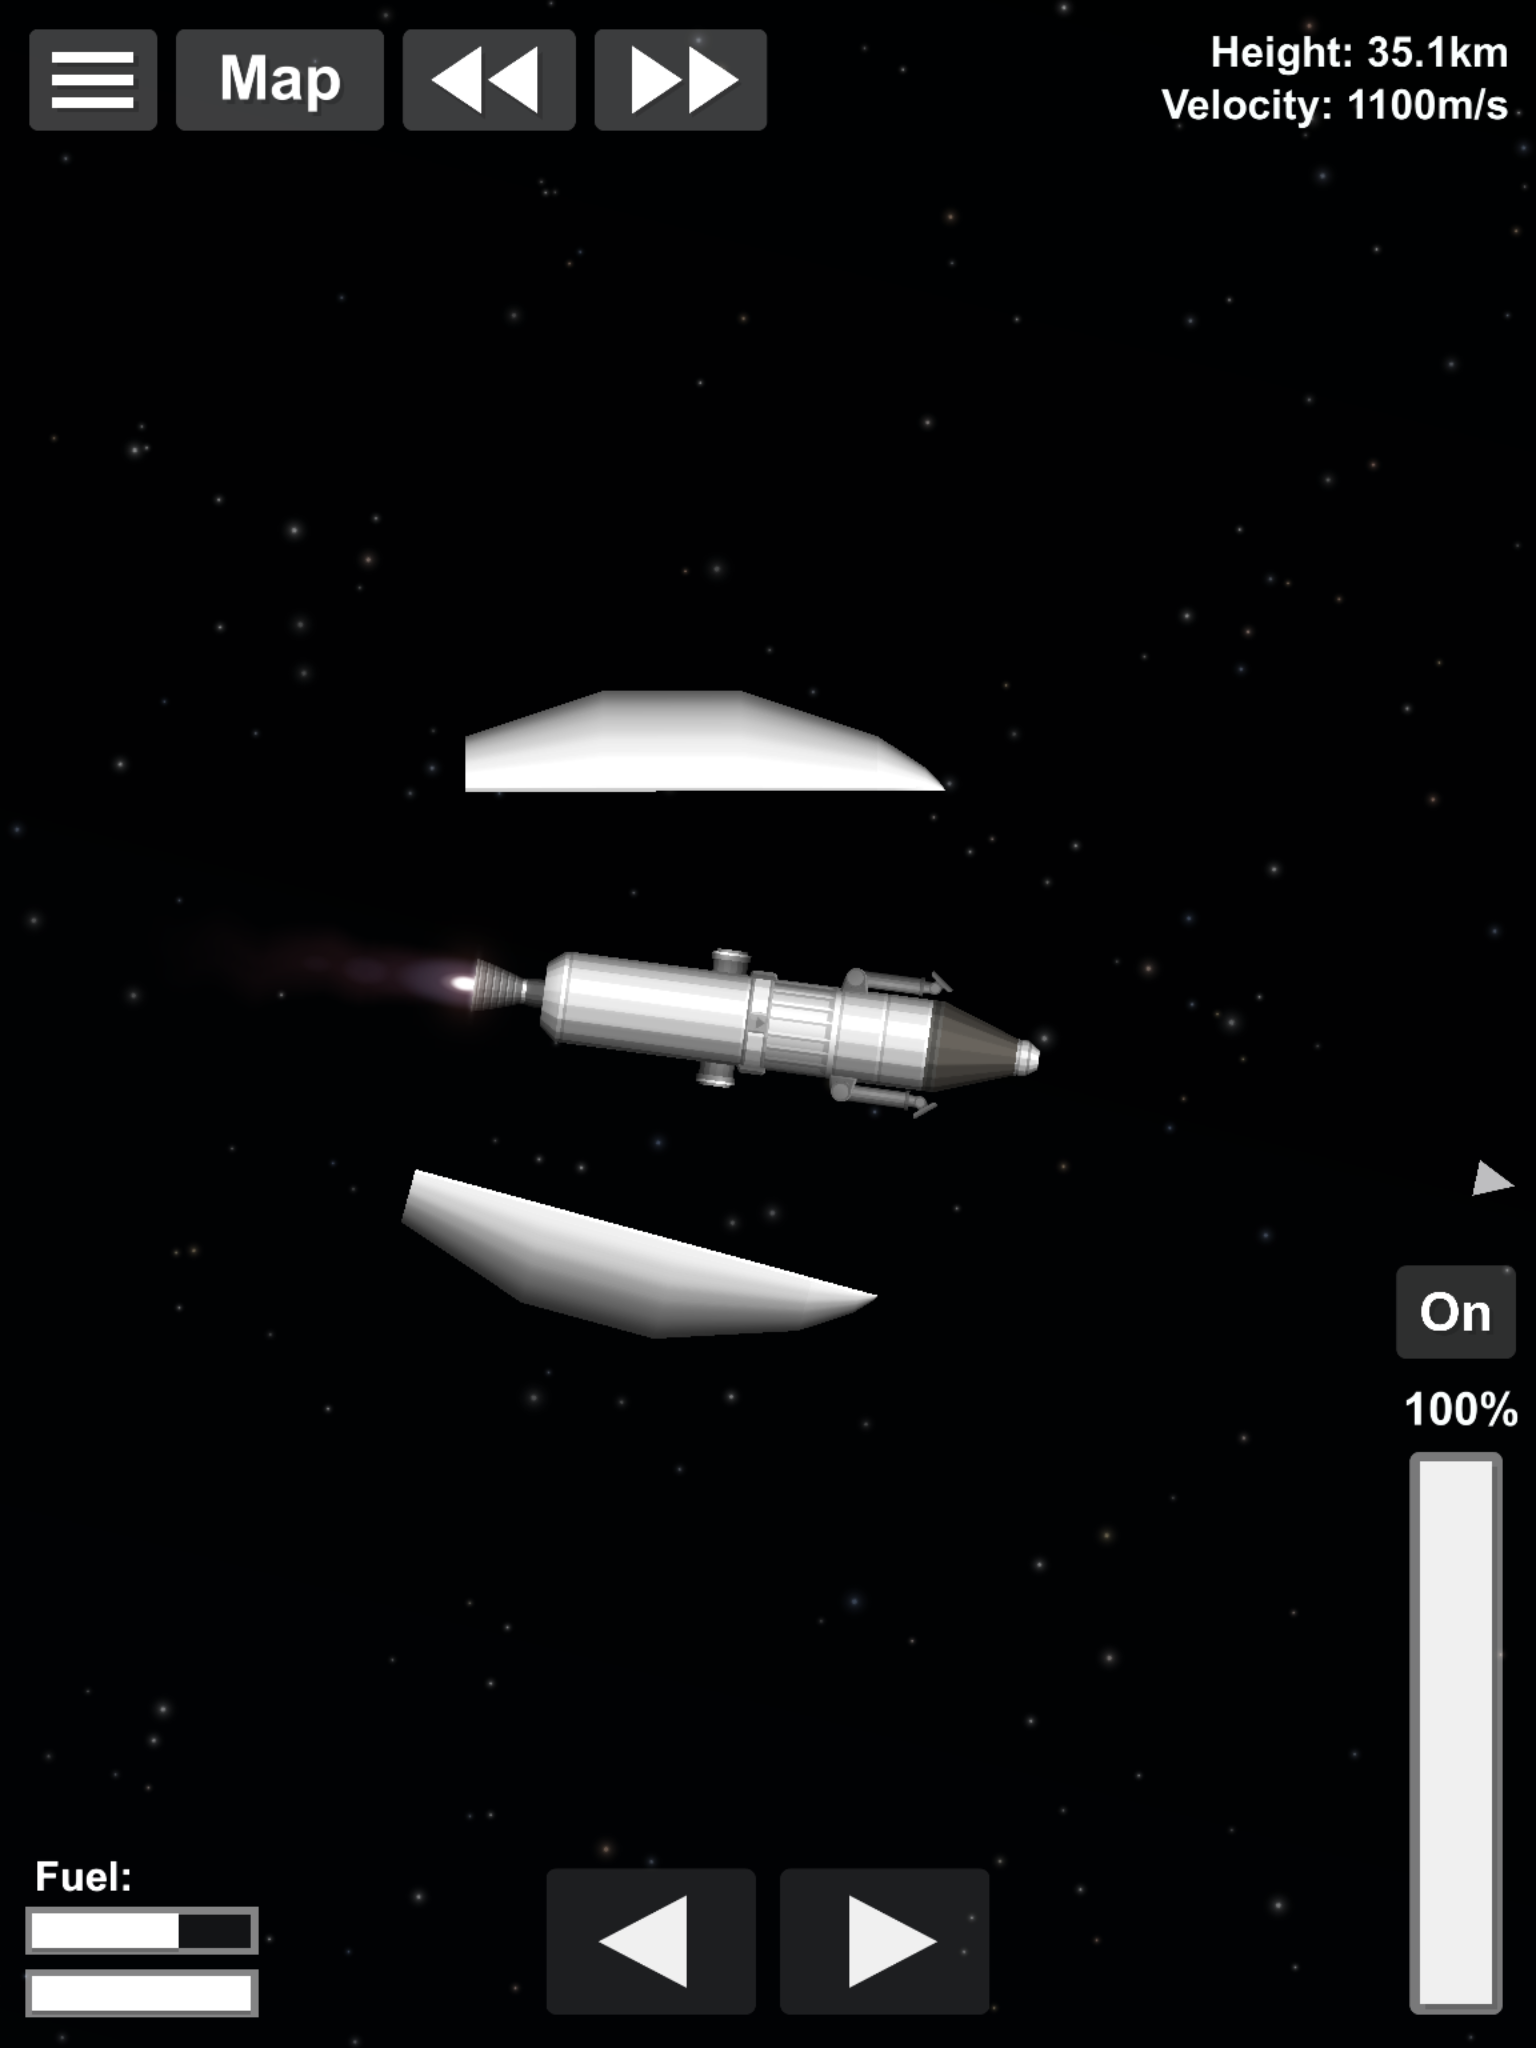
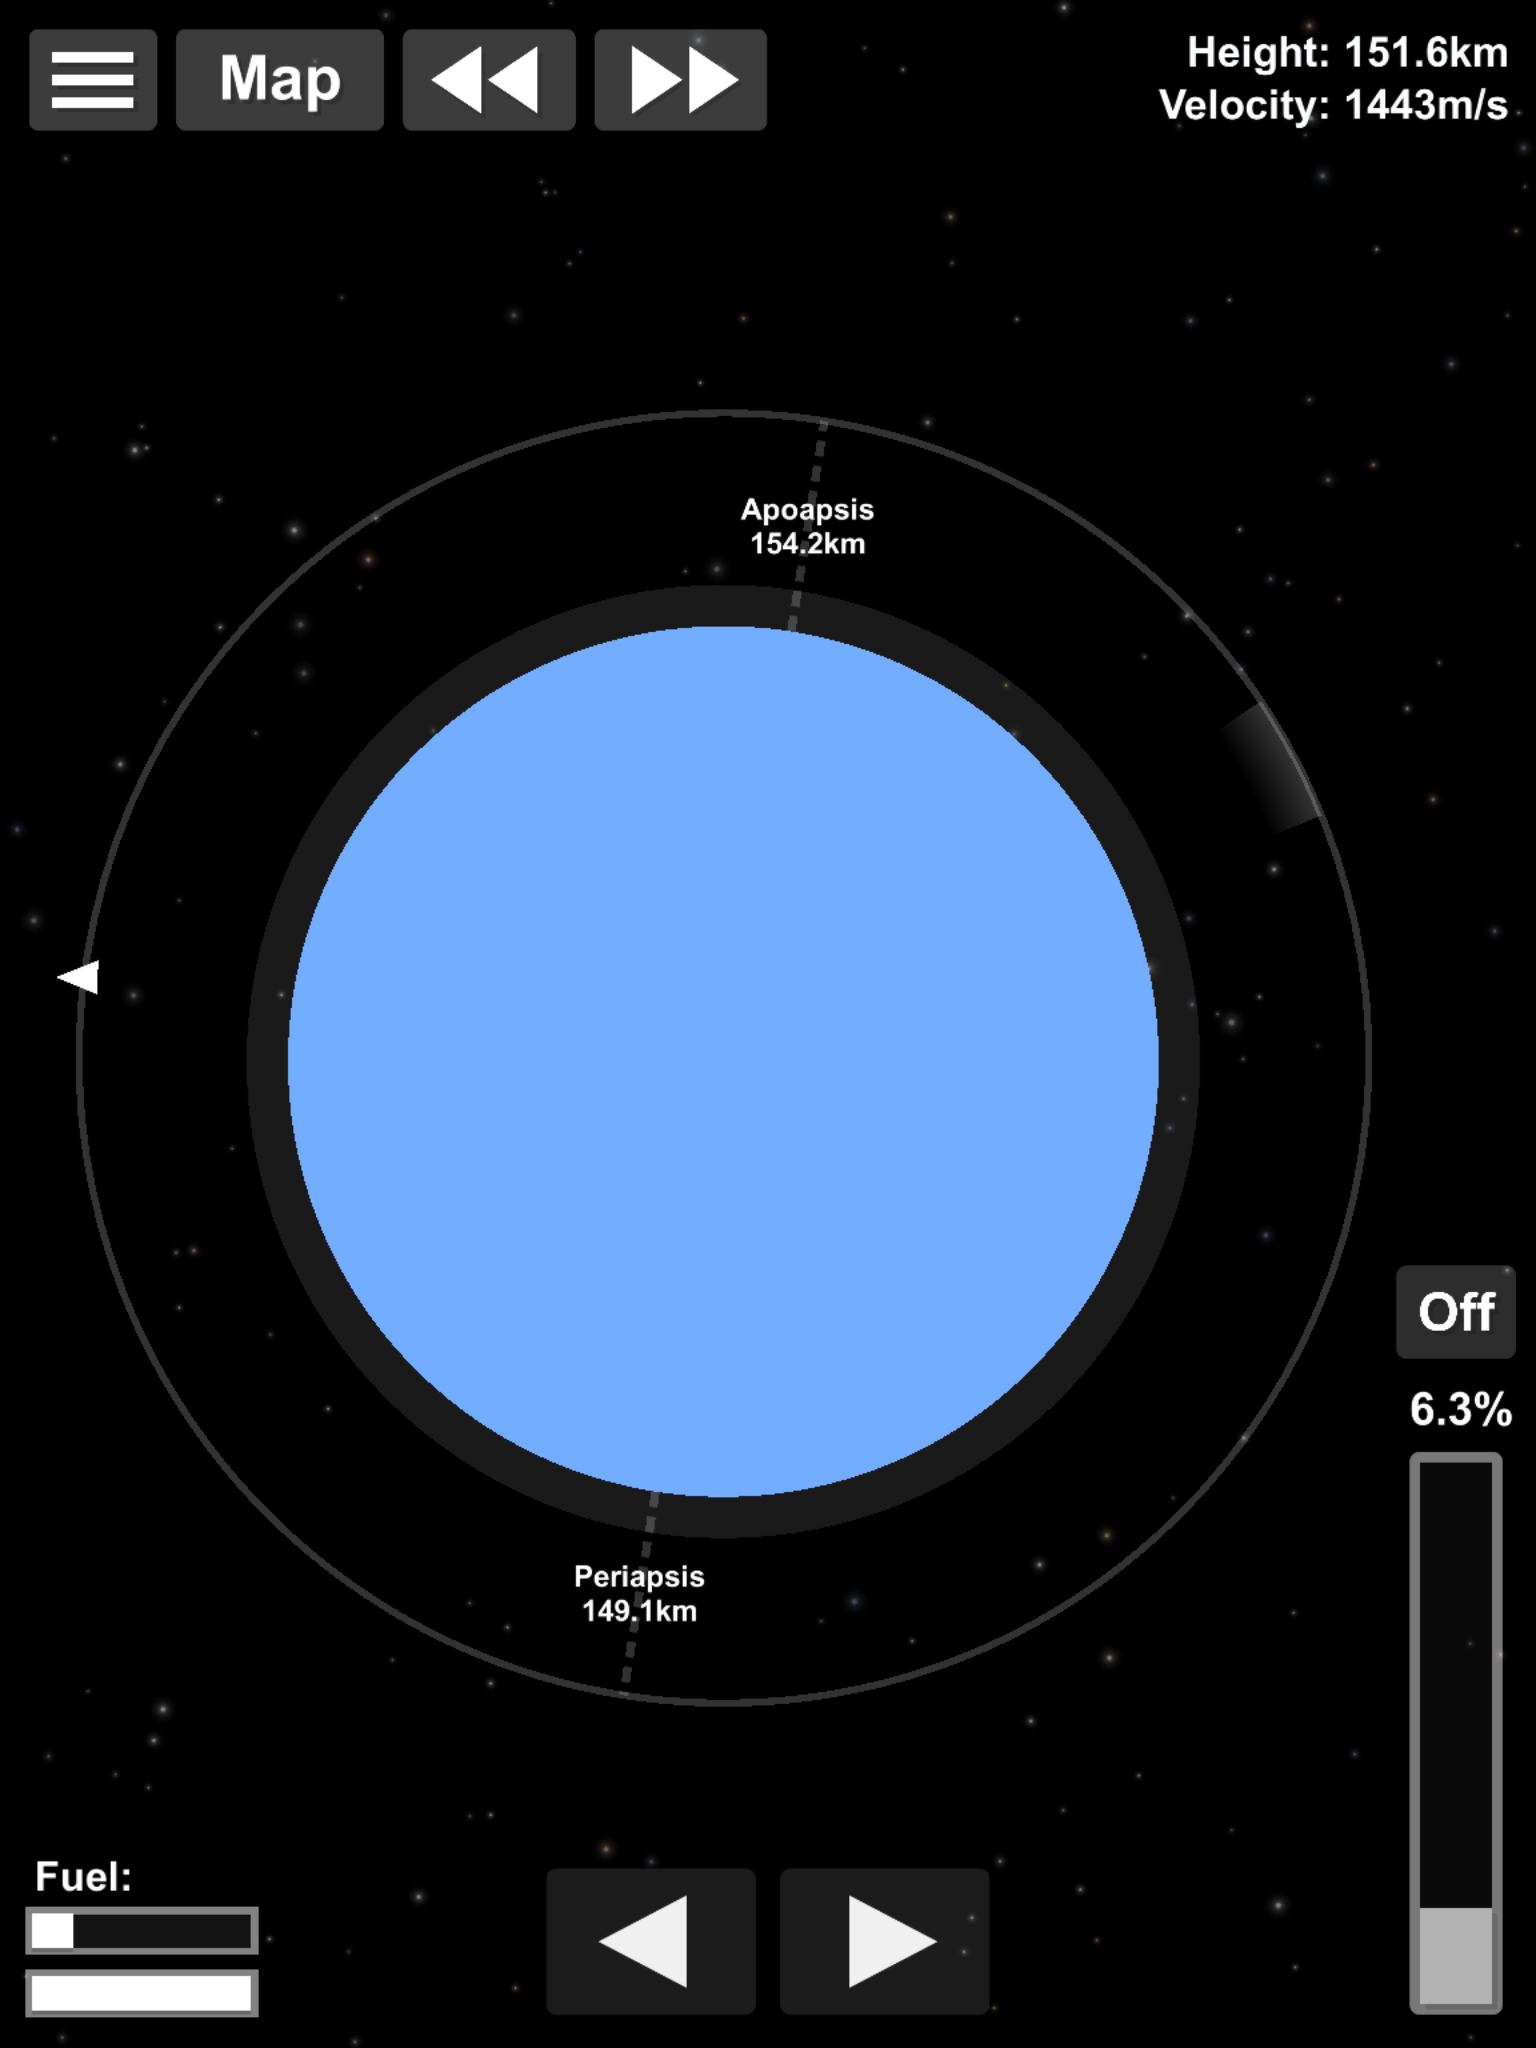
Knocking off the fairings (by pressing on them) and burning onwards to a decent orbital height.


Screenshot_2019-03-29-01-19-33.png


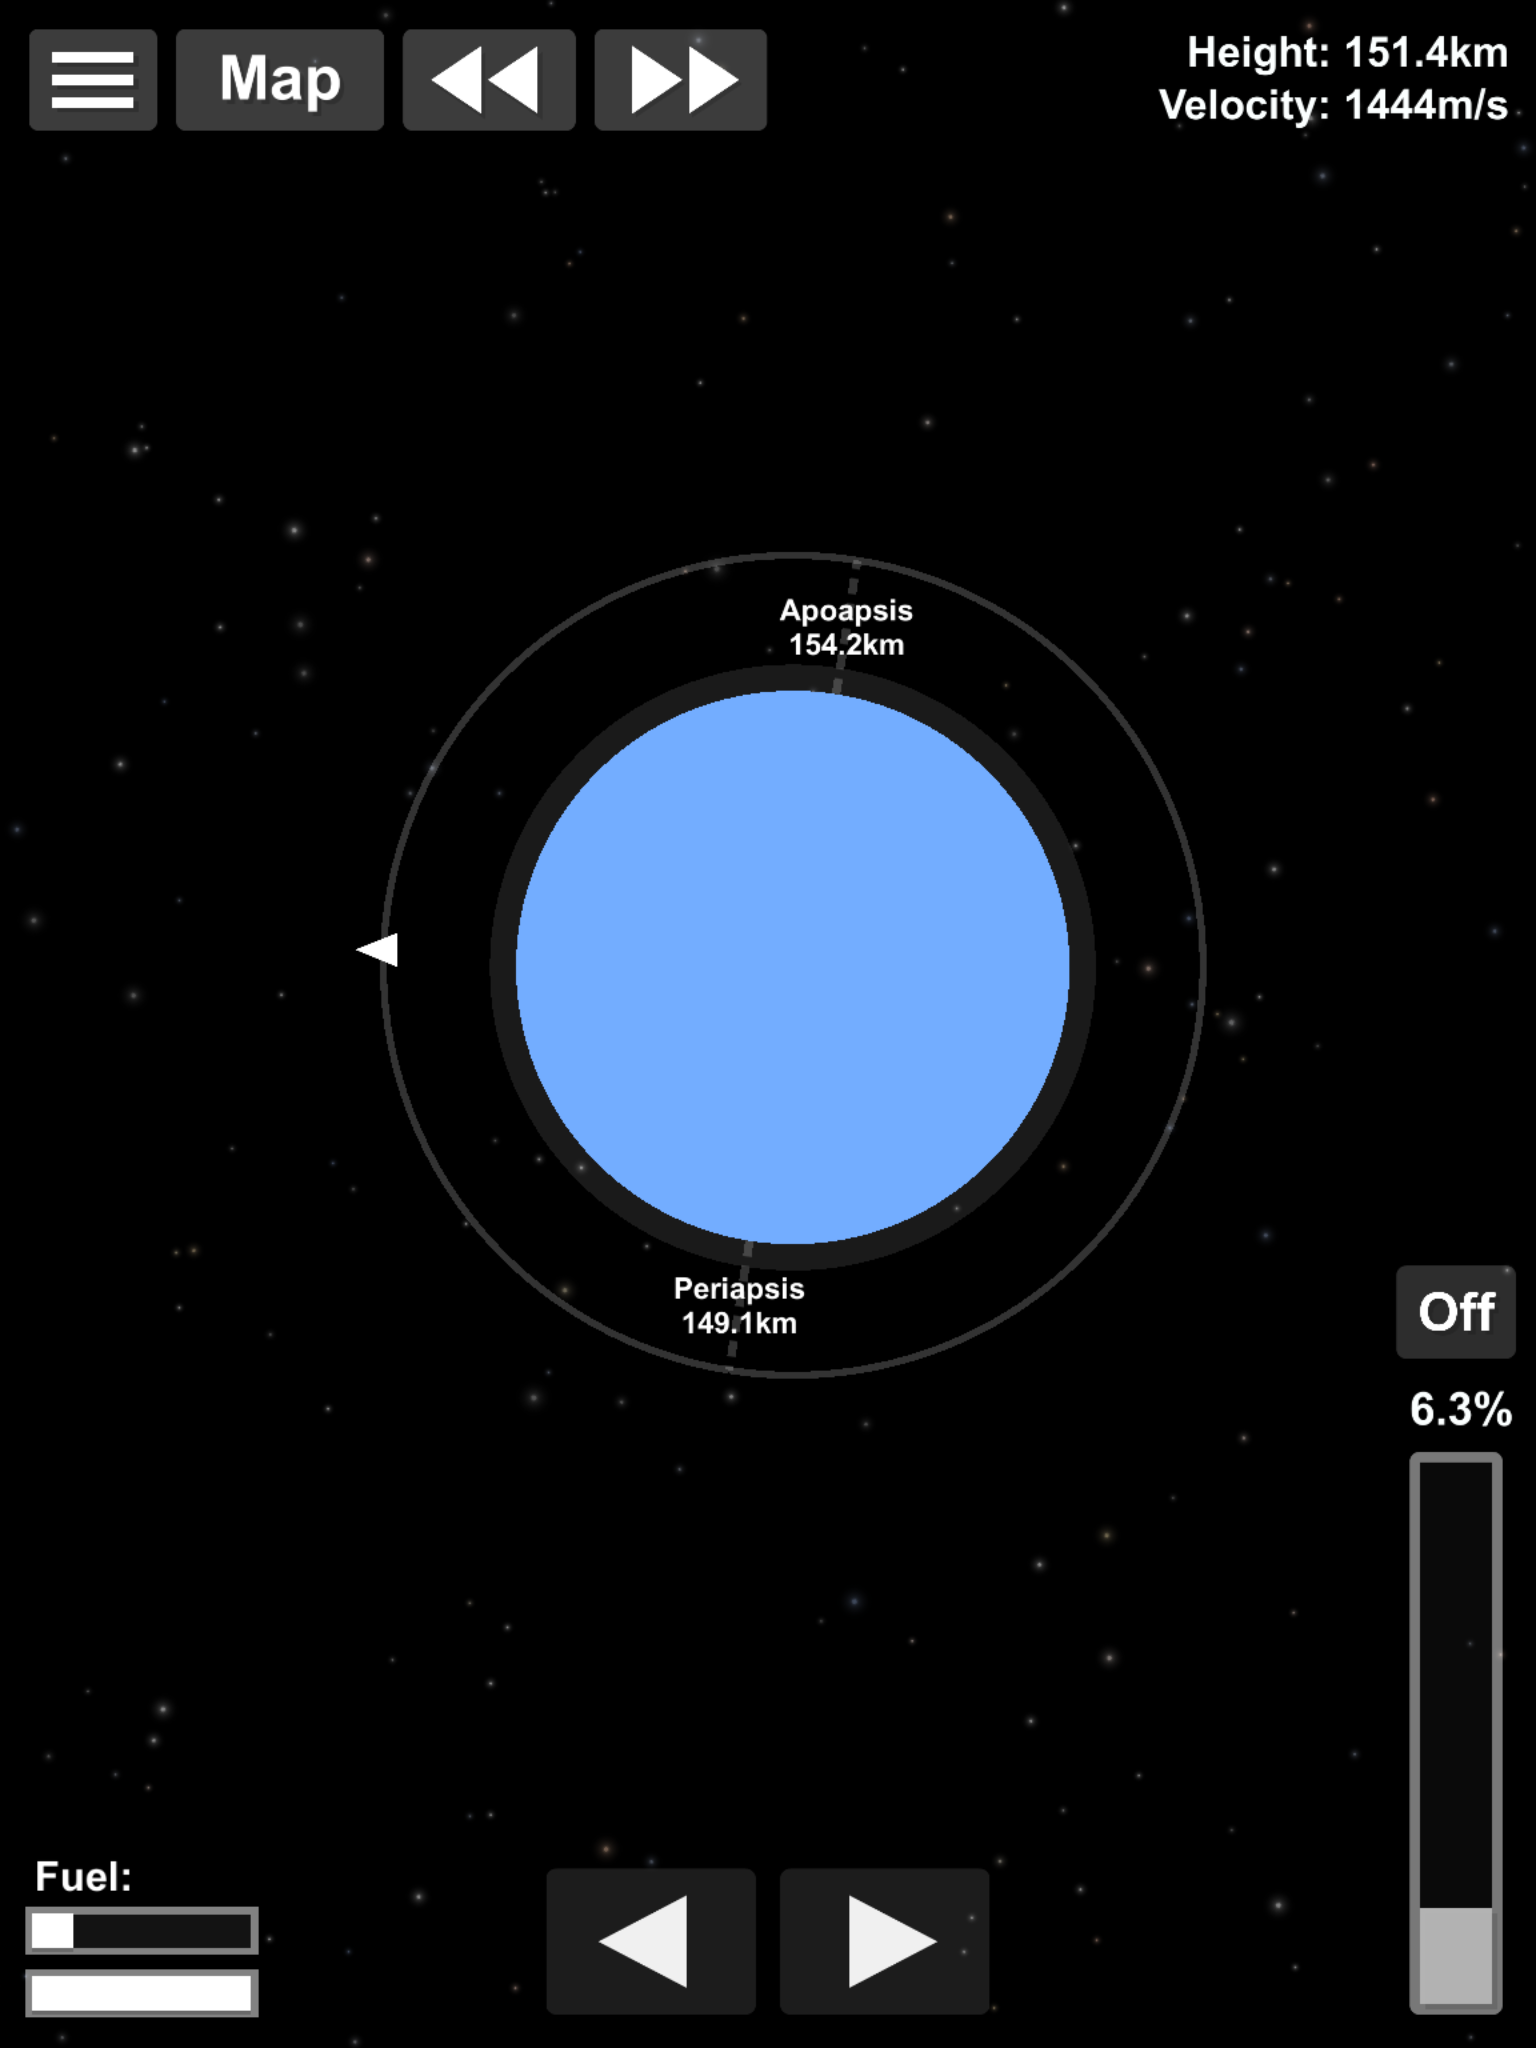
In this case, to a rough 150km orbit towards the higher end of LEO.

Next, to select an appropriate destination. In this case the moon. So select the map view, and zoom out until the moon is visible and press on it

Screenshot_2019-03-29-01-19-48.png


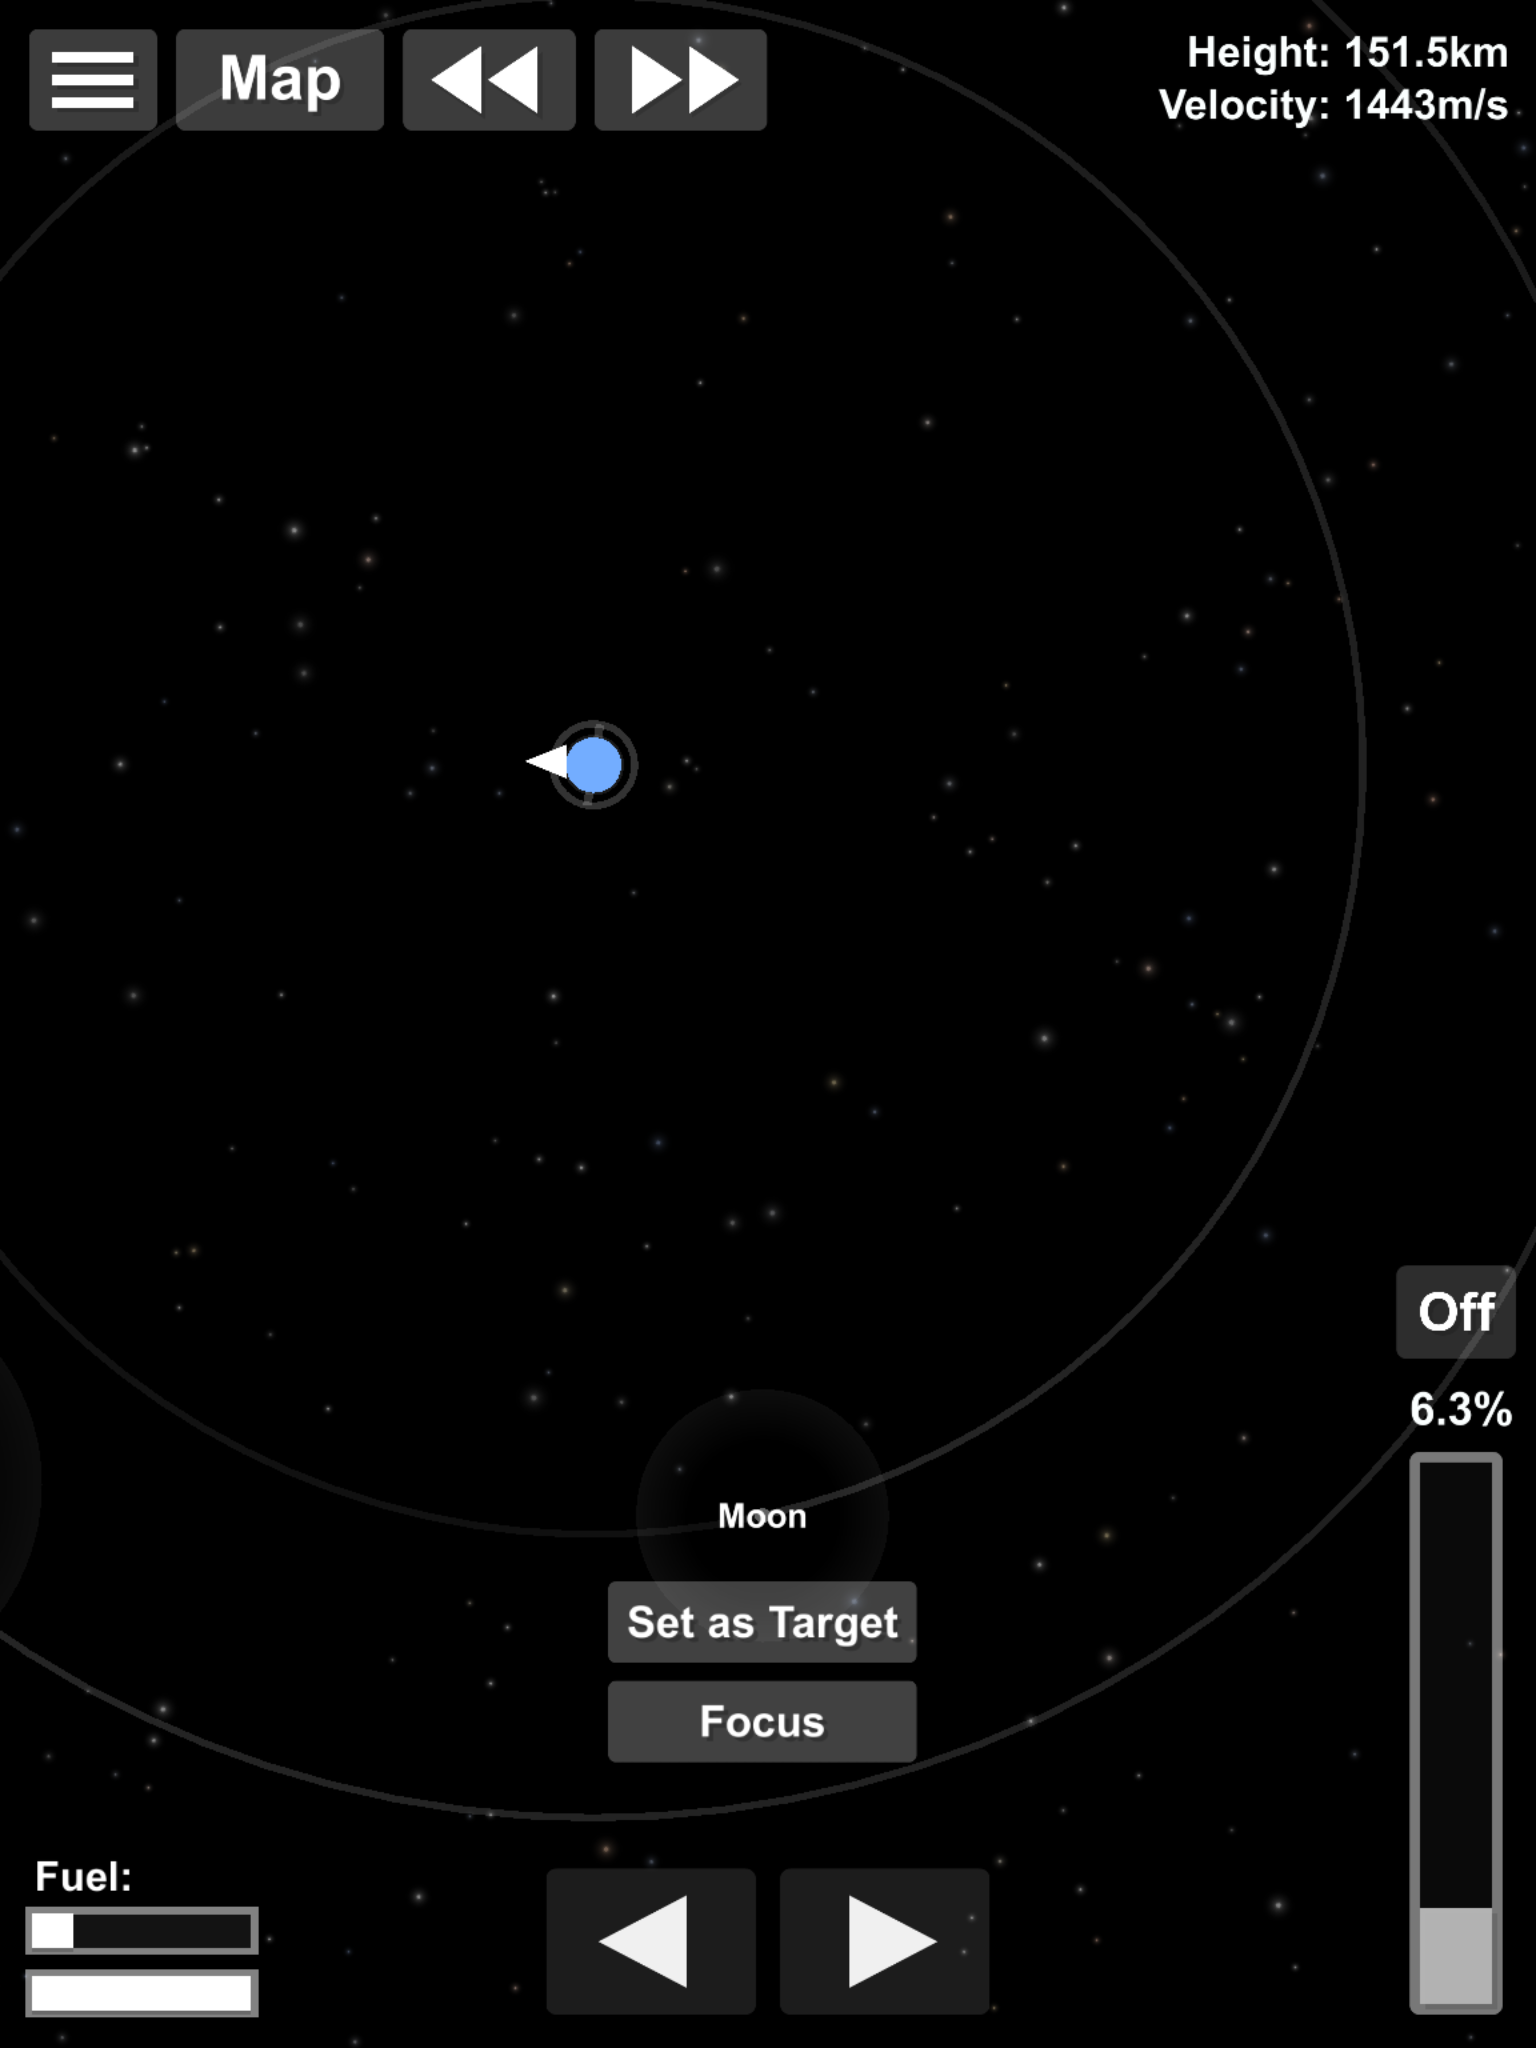
Then press 'Set As Target'. Focus makes the selected body the centre of the screen and zooms in appropriately. We don't wanna be doing that yet though.

Screenshot_2019-03-29-01-20-01.png


What will appear now is a thicker shaded area on your rockets orbit. This is the mythical Transfer Window and is the most efficient area to start your TLI burn.

Once you are inside this shaded area, rotate your rocket and burn prograde. Your orbit will start elongating away from you, raising your apoapsis towards Lunar orbit, where the Moon is projected to be by the time you arrive.

At some point along this burn, stage 2 may cut out. Kick it off and continue on with the landers engines until you hit an encounter.

Screenshot_2019-03-29-01-22-02.png


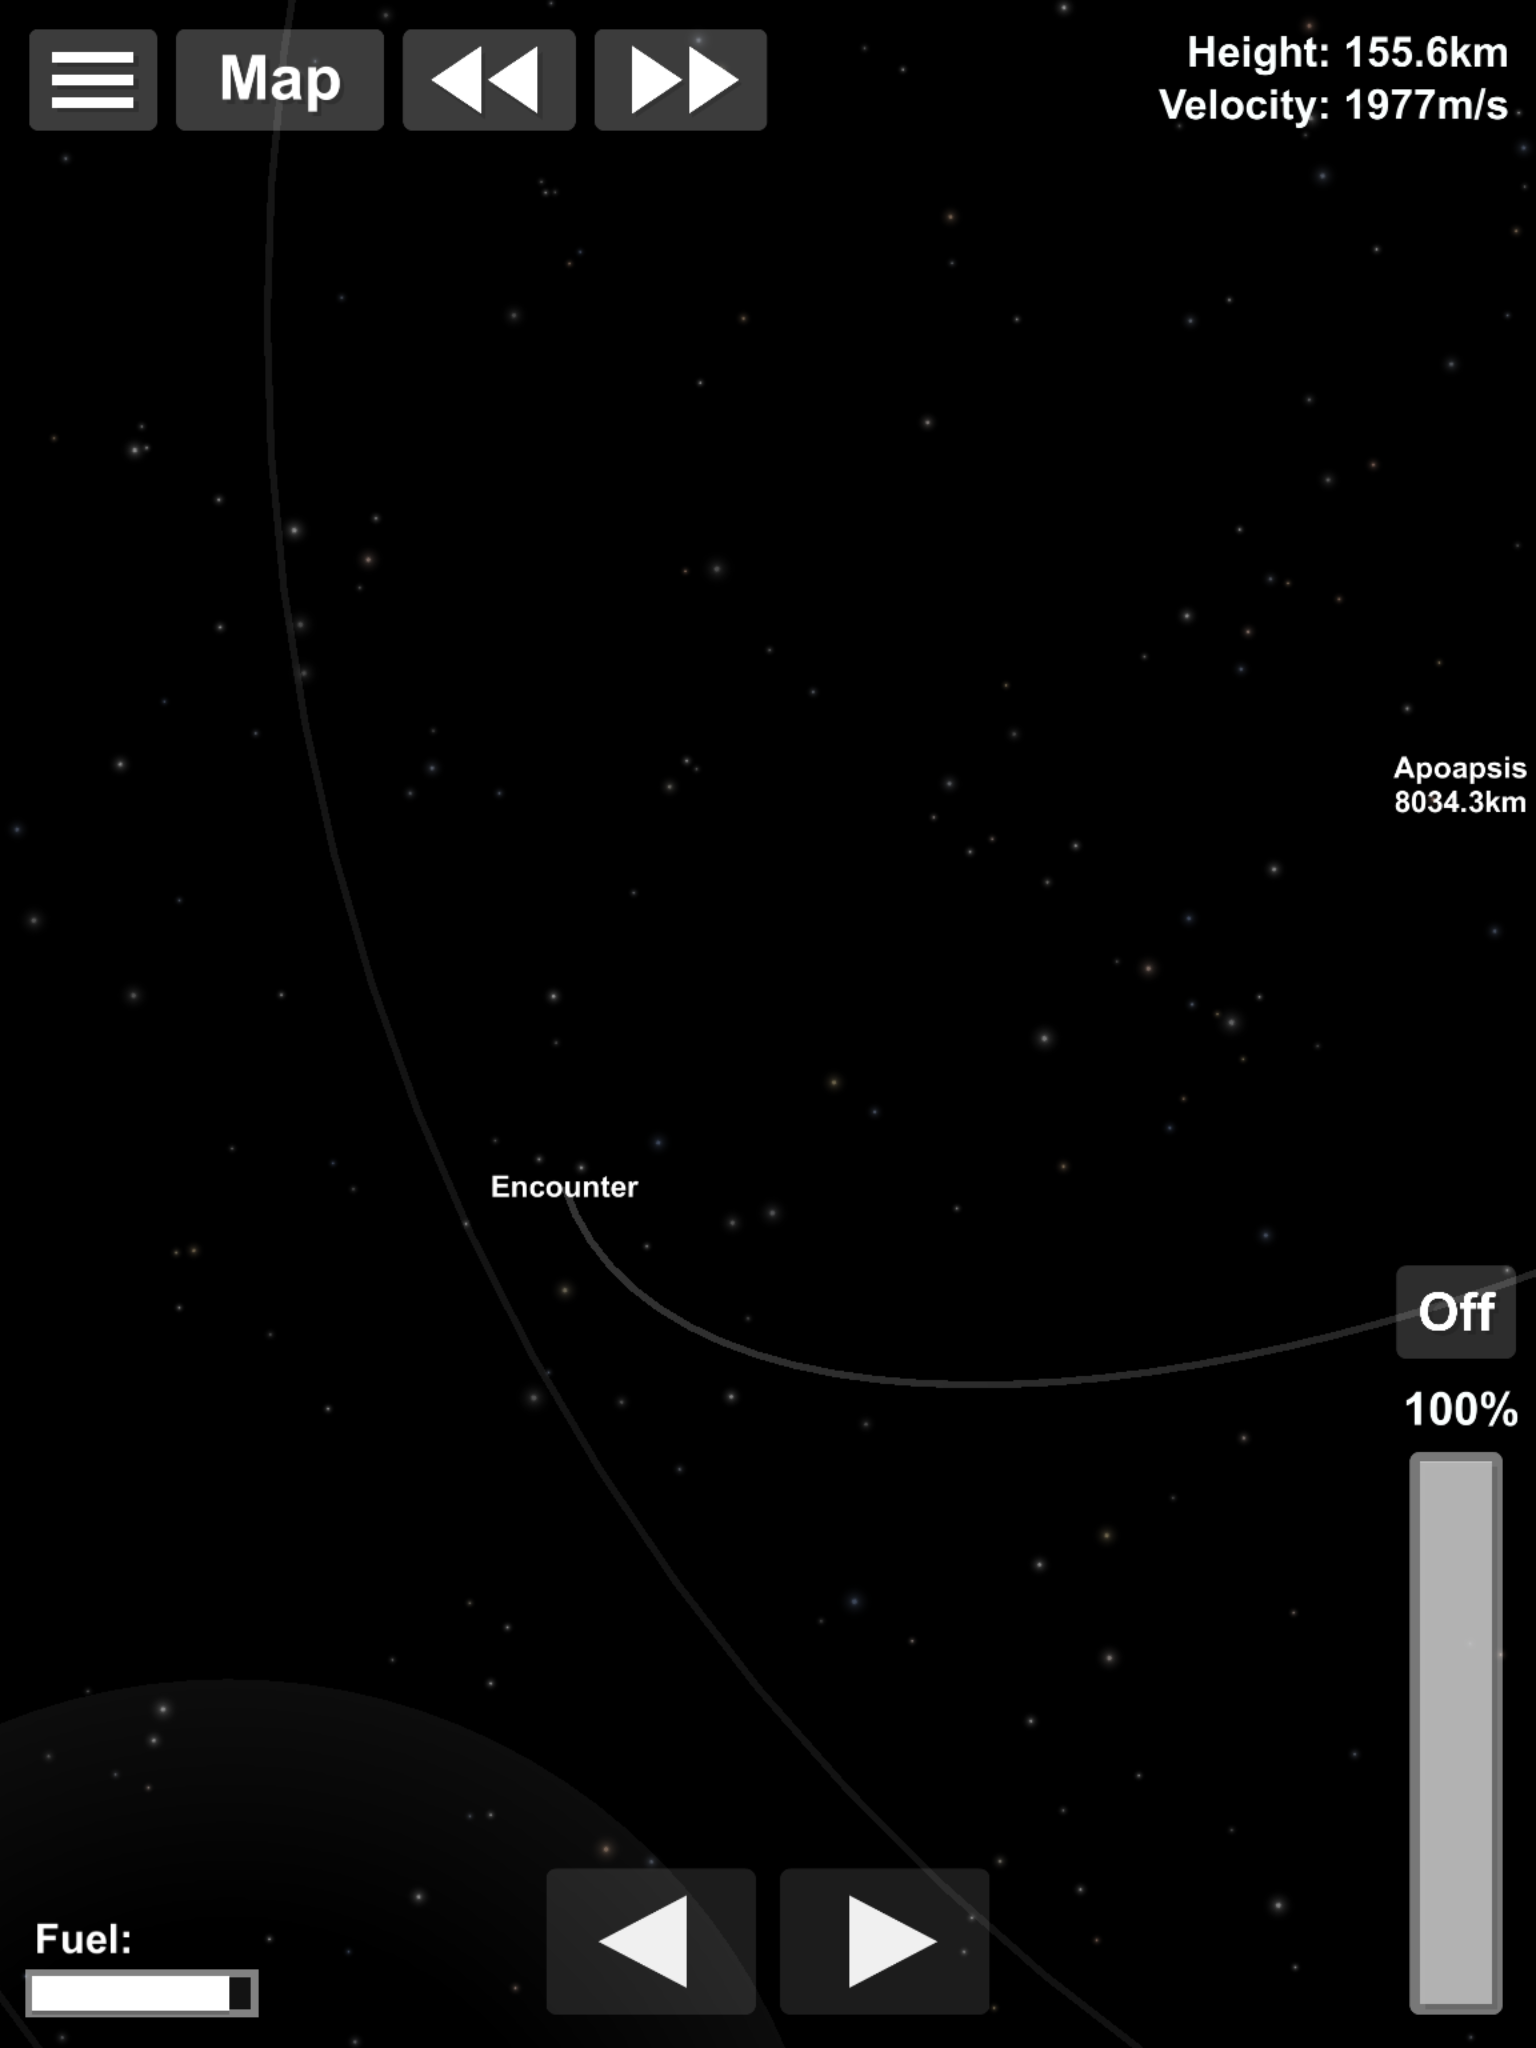
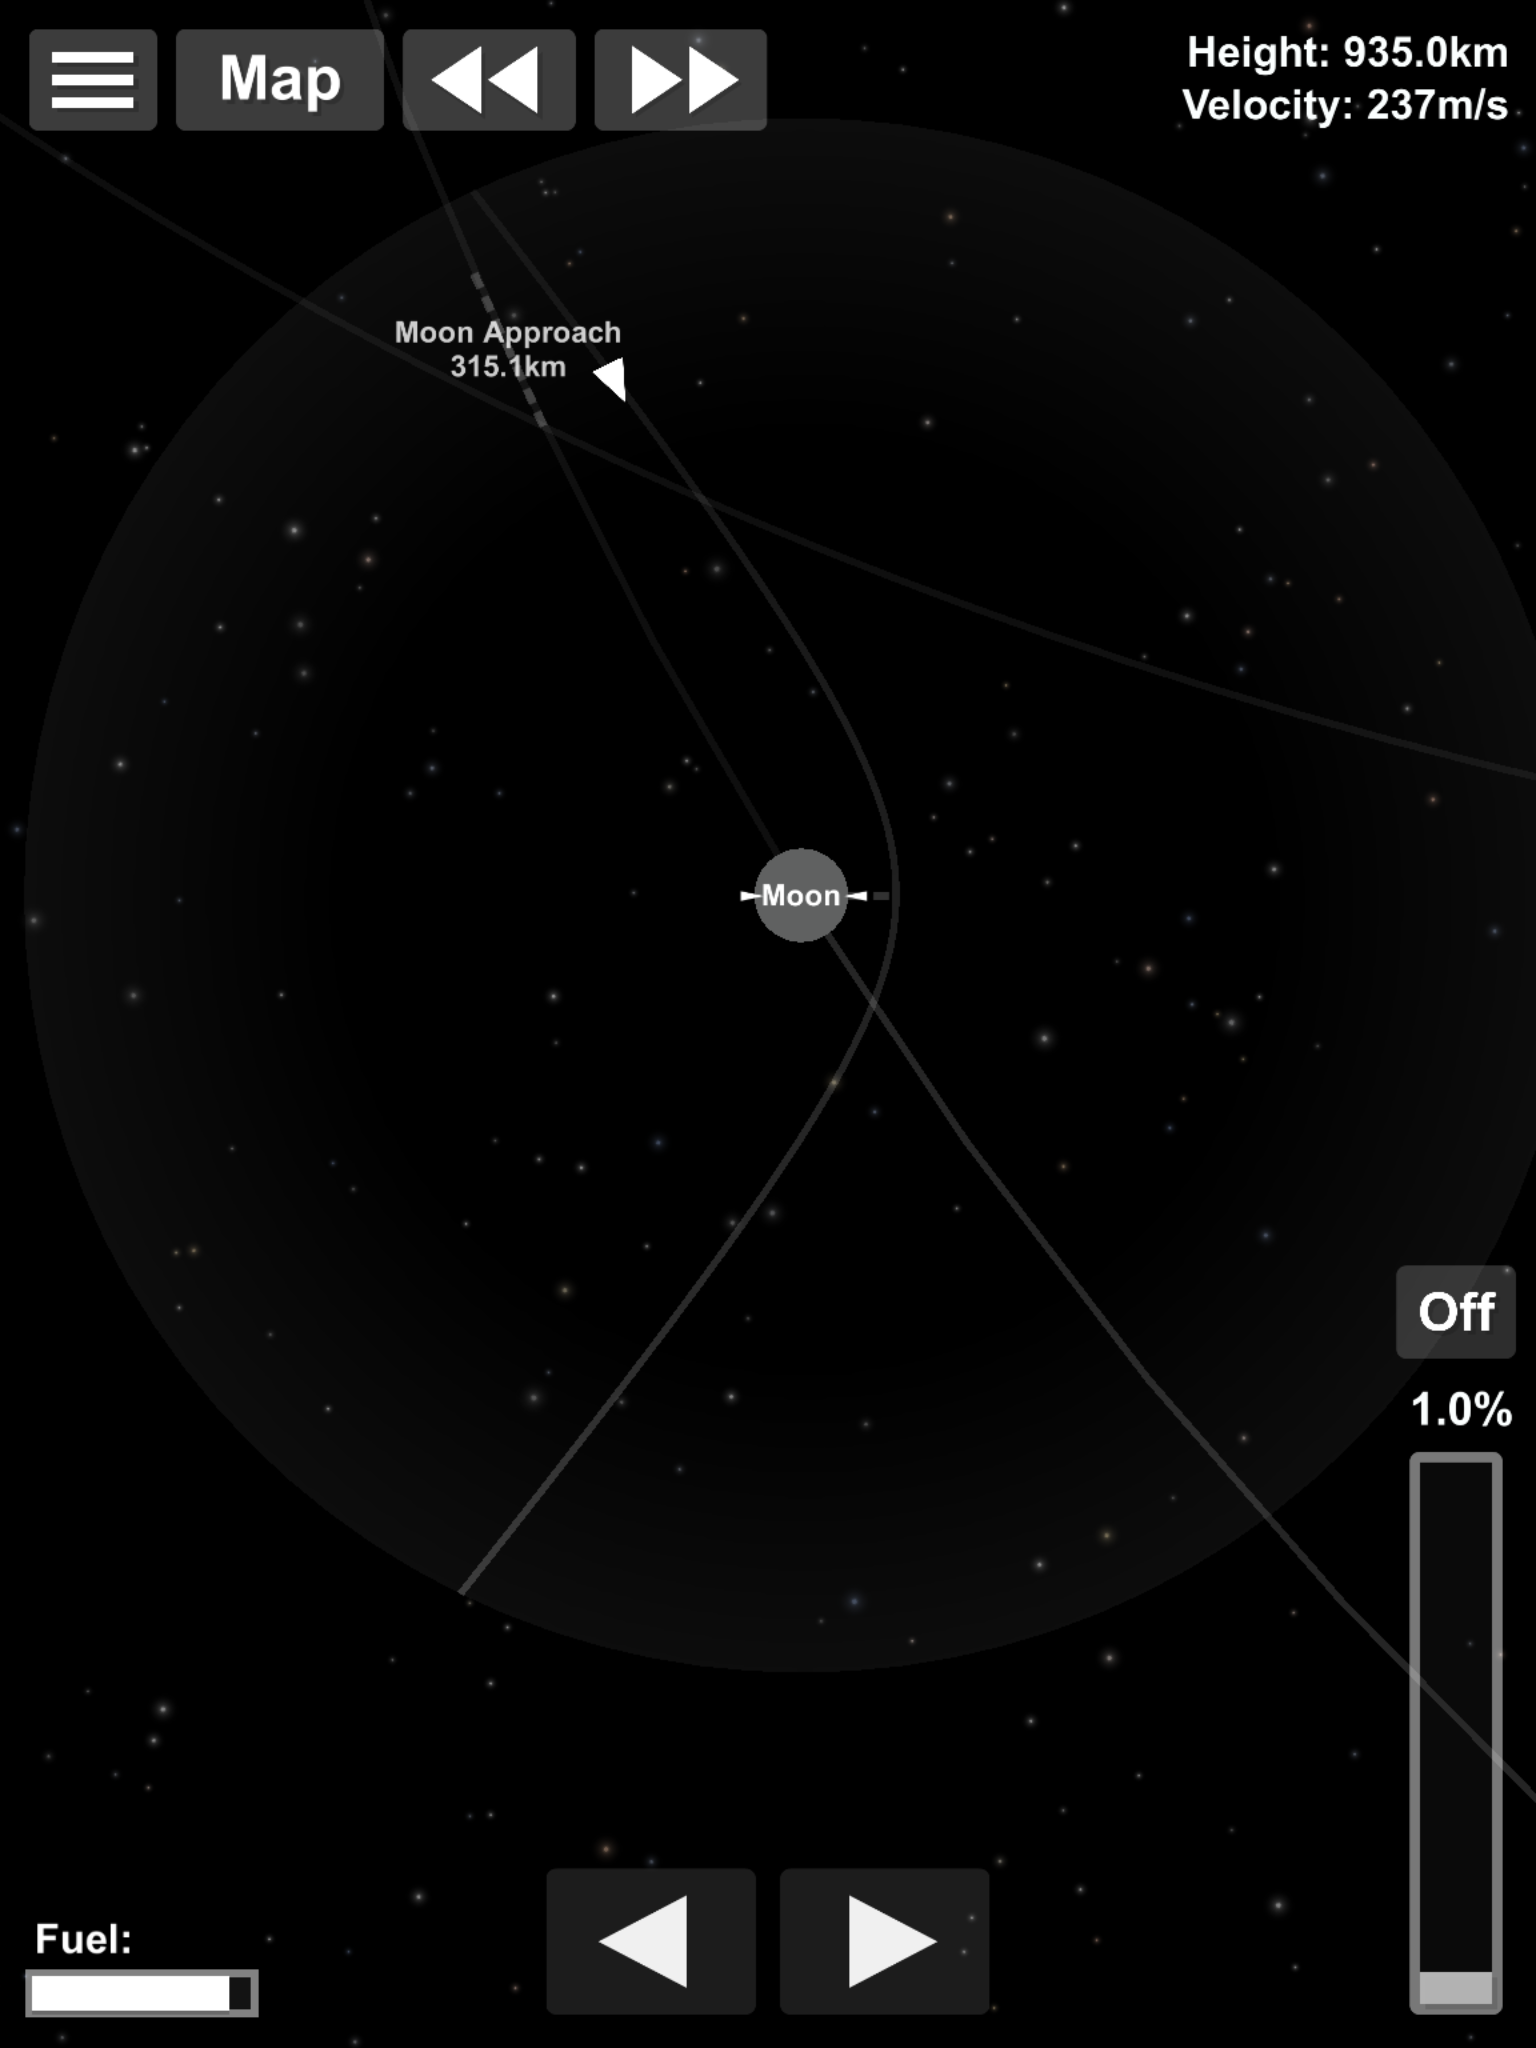
Now, if you scroll over to the moon in map view, you should see inside its SOI its own projected orbital path, and a new line.

Screenshot_2019-03-29-01-22-08.png


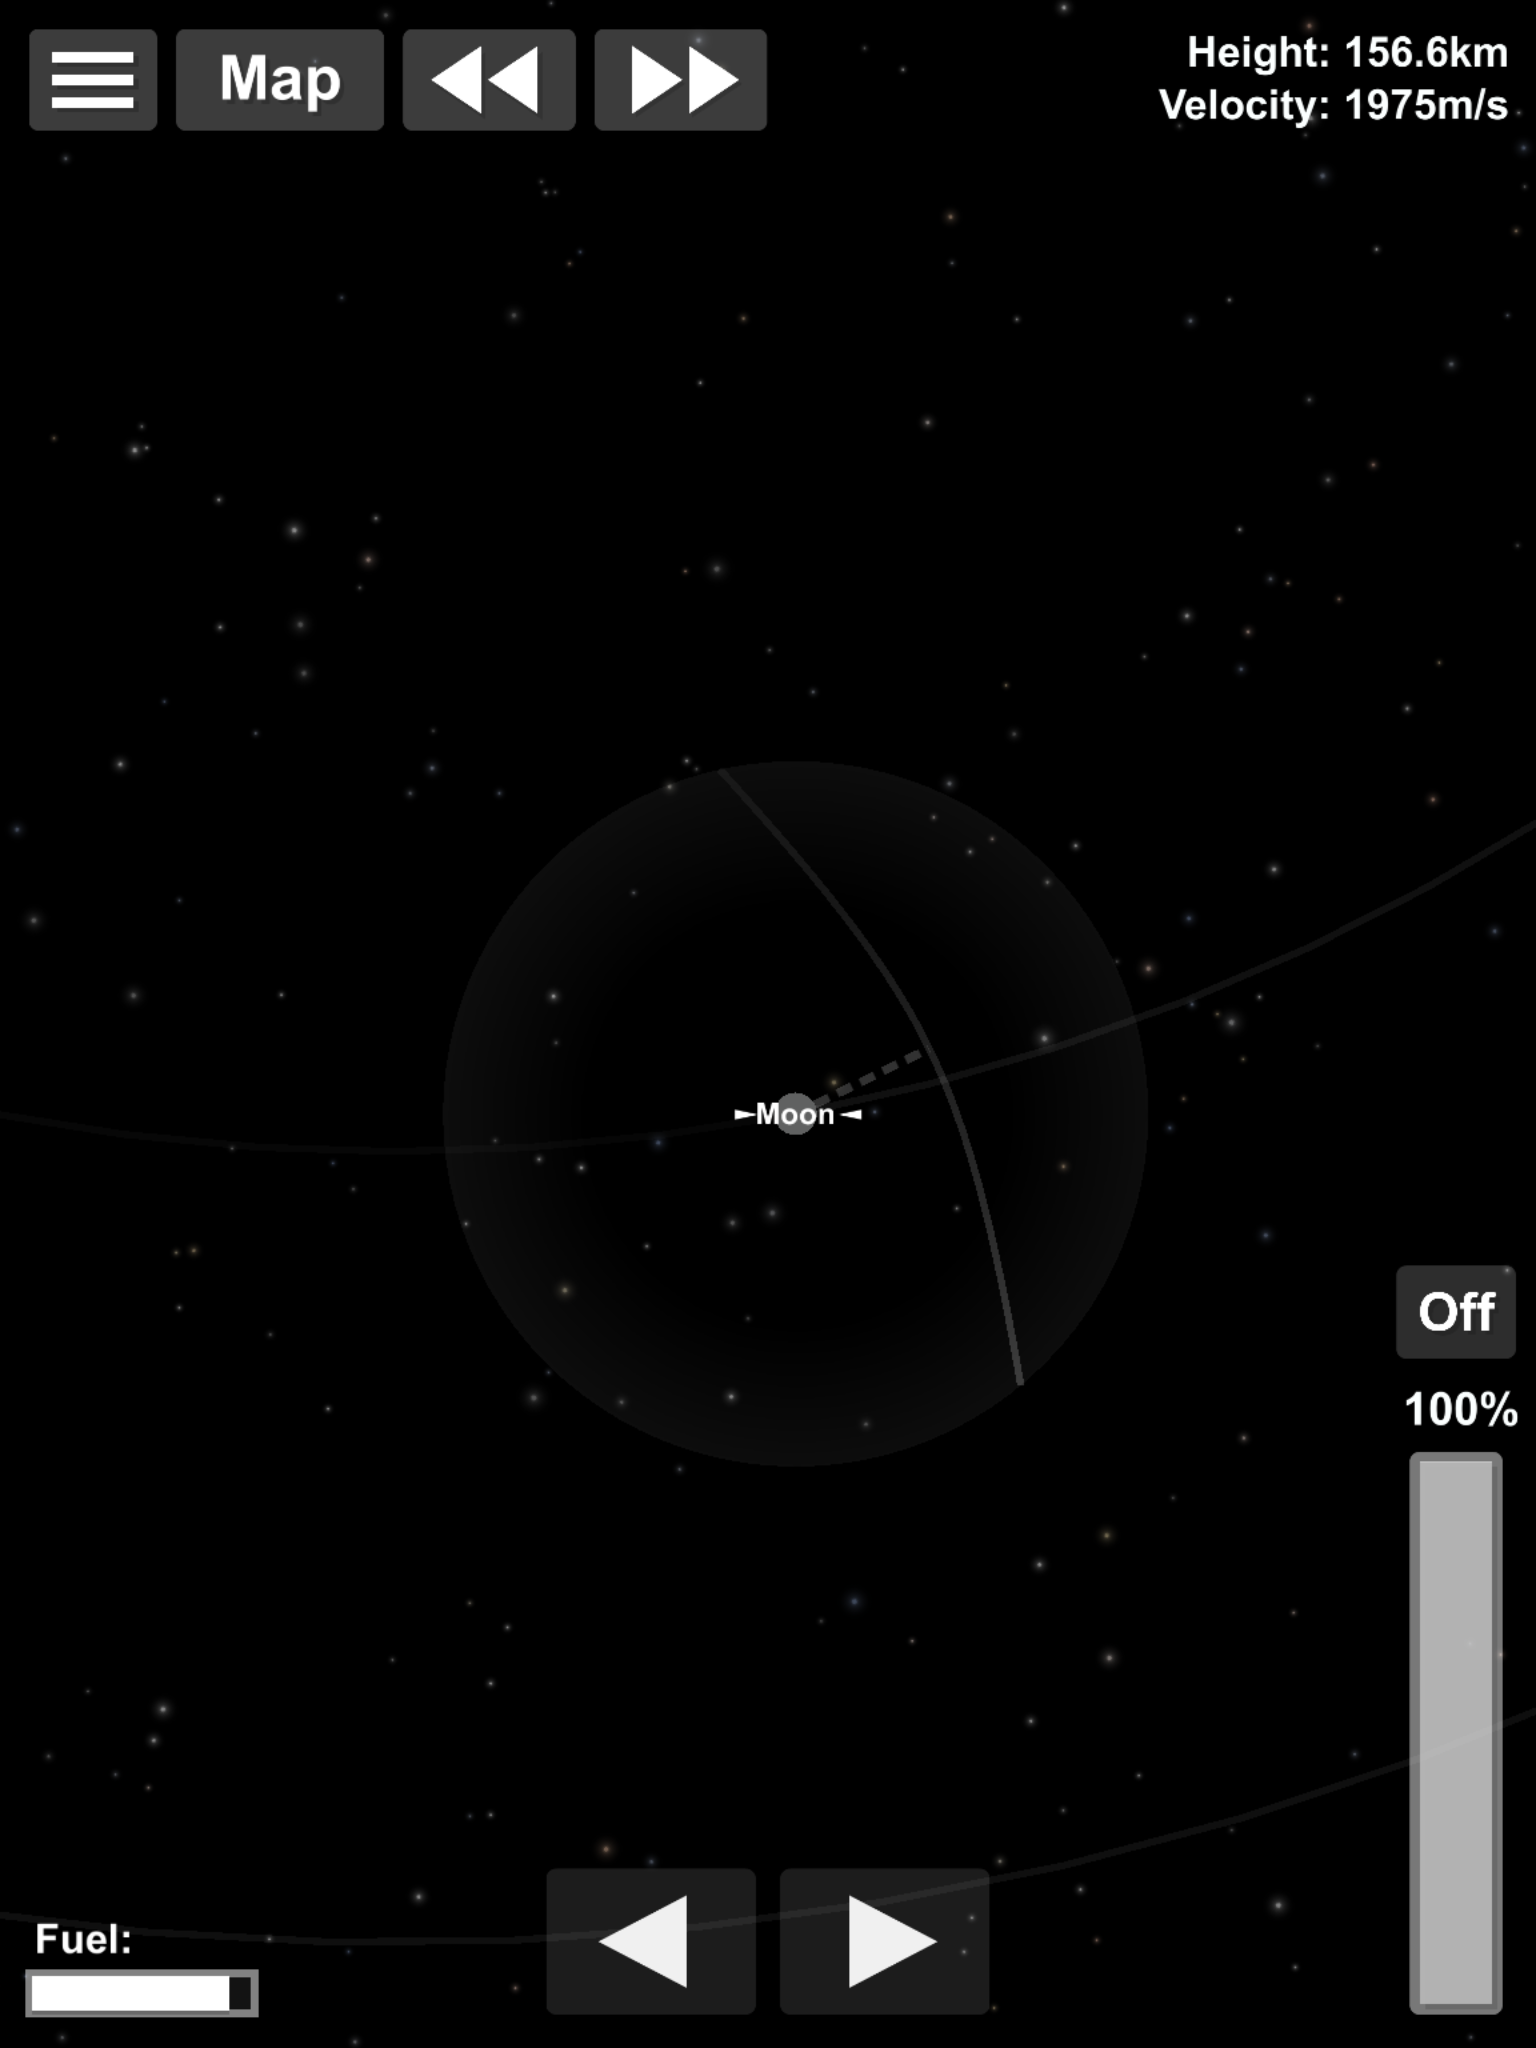
This line is your projected path inside its SOI, including a new periapsis. When this happens, throttle right down and bring that periapsis down a bit closer to the Moon. The earlier you do this, the less Dv it'll cost you to do so because you're still inside Earths transfer window and taking advantage of that previously mentioned Oberth Effect.

I drop mine to about 90km and then cut engine.

Screenshot_2019-03-29-01-22-39.png


Next, sit back and relax whilst your rocket coasts the distance from Earth to the Moon. Time warp up and you'll see the moon and your rocket closing in on each other.

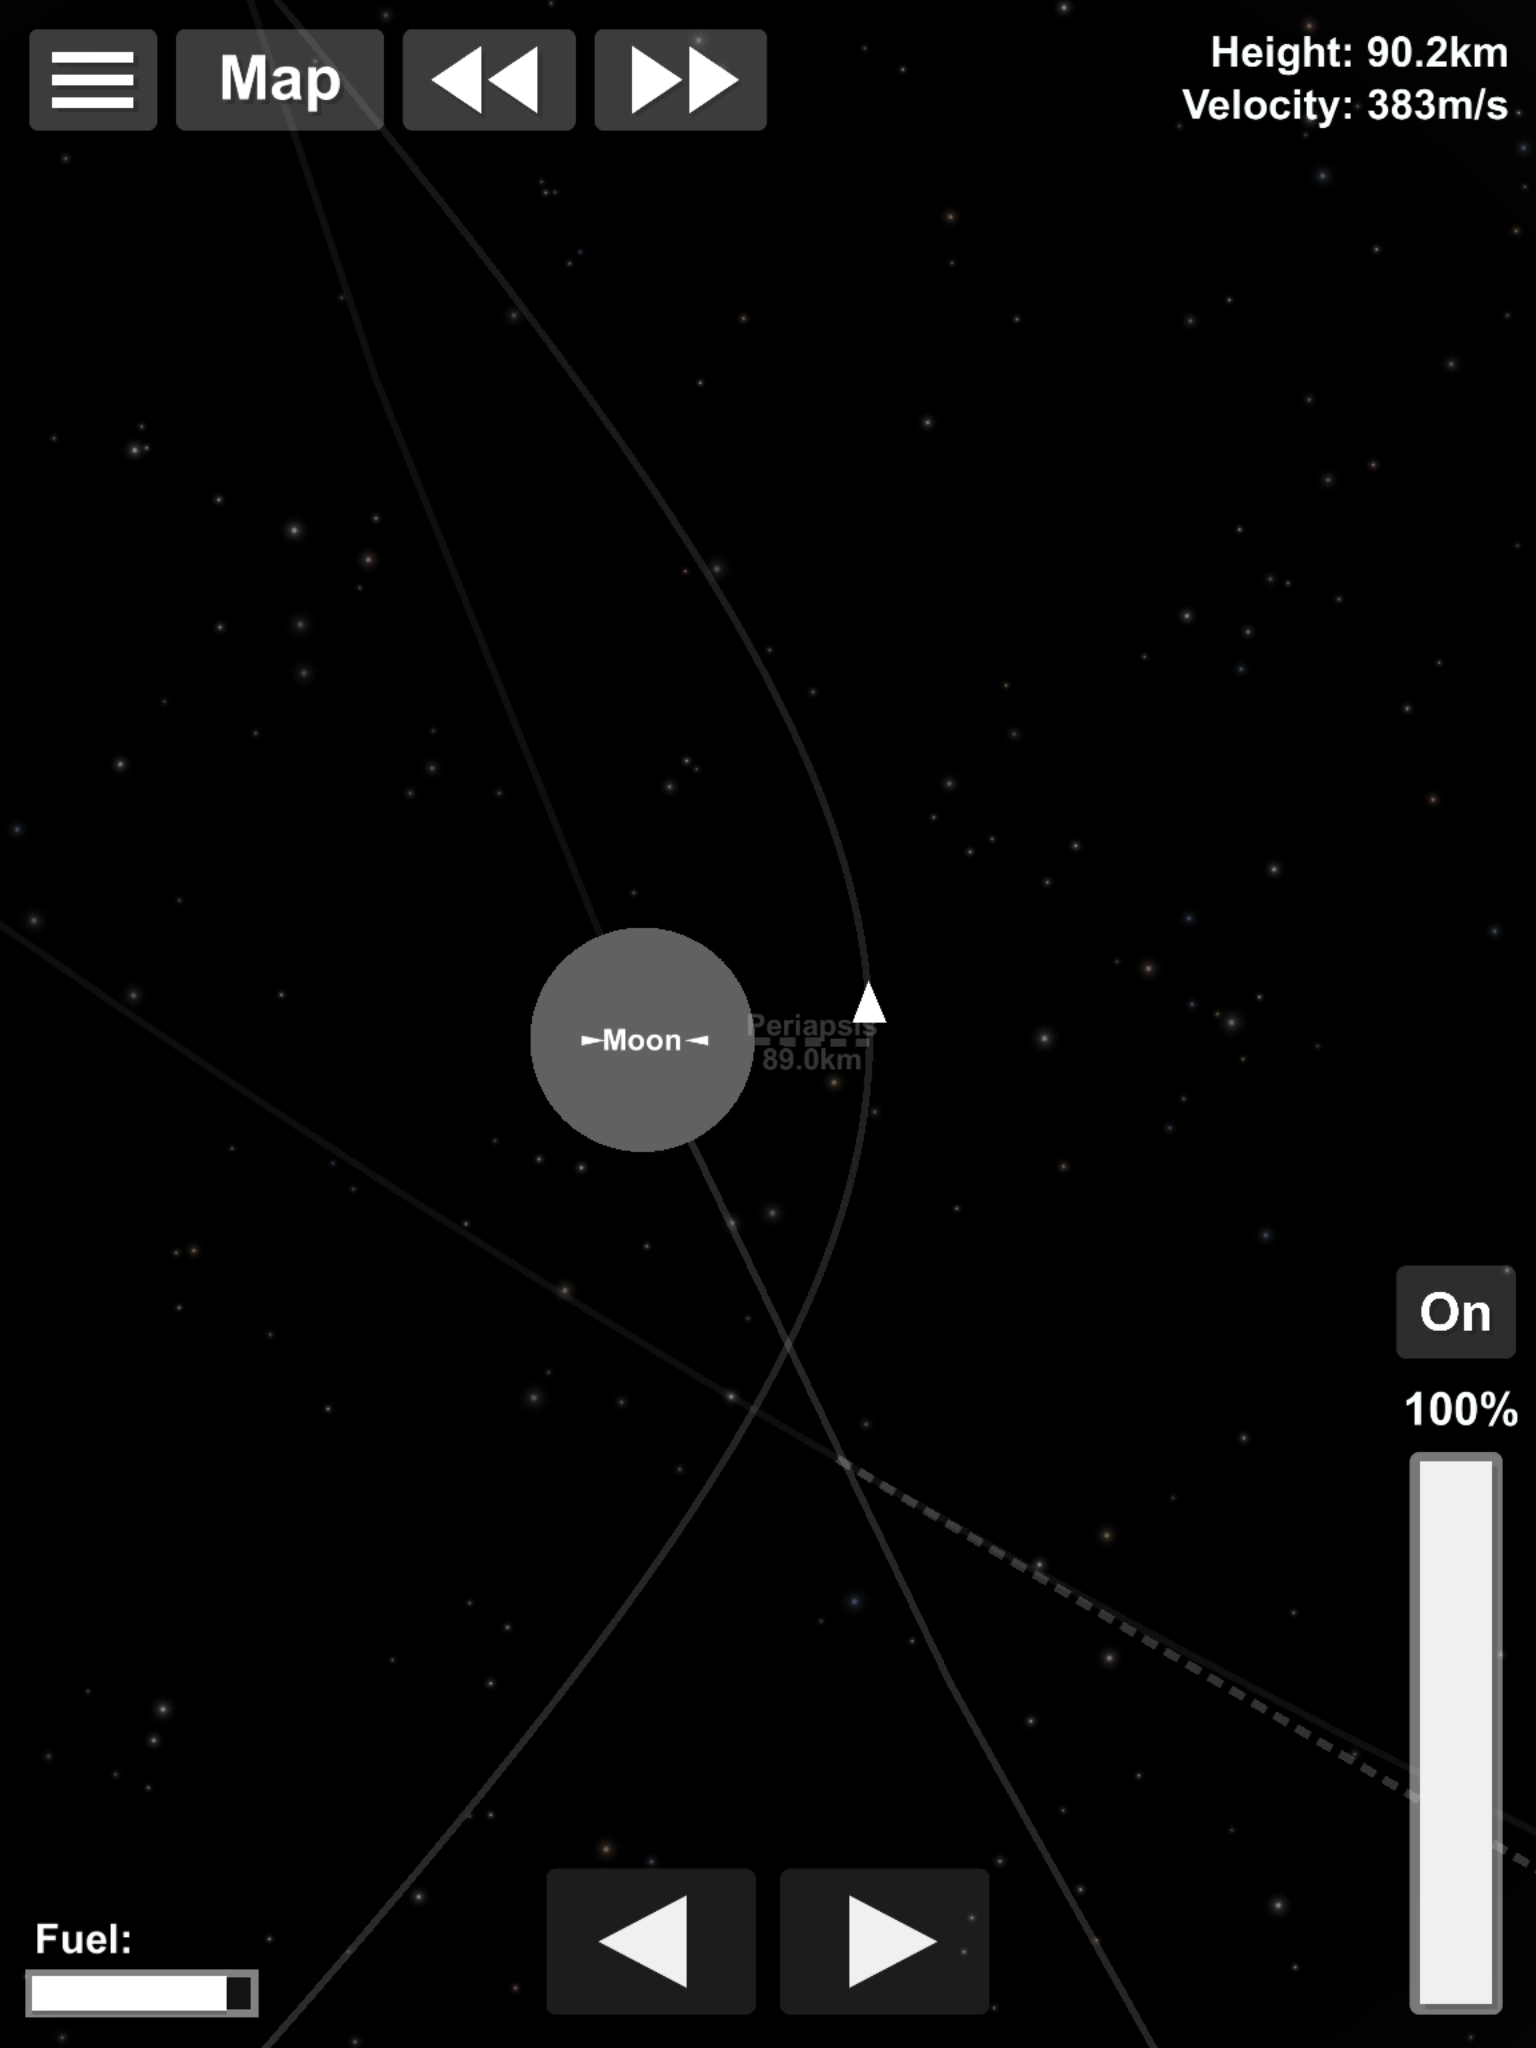
Once you enter the Moons SOI, then cut the time warp and its time for some more work.

Screenshot_2019-03-29-01-23-33.png


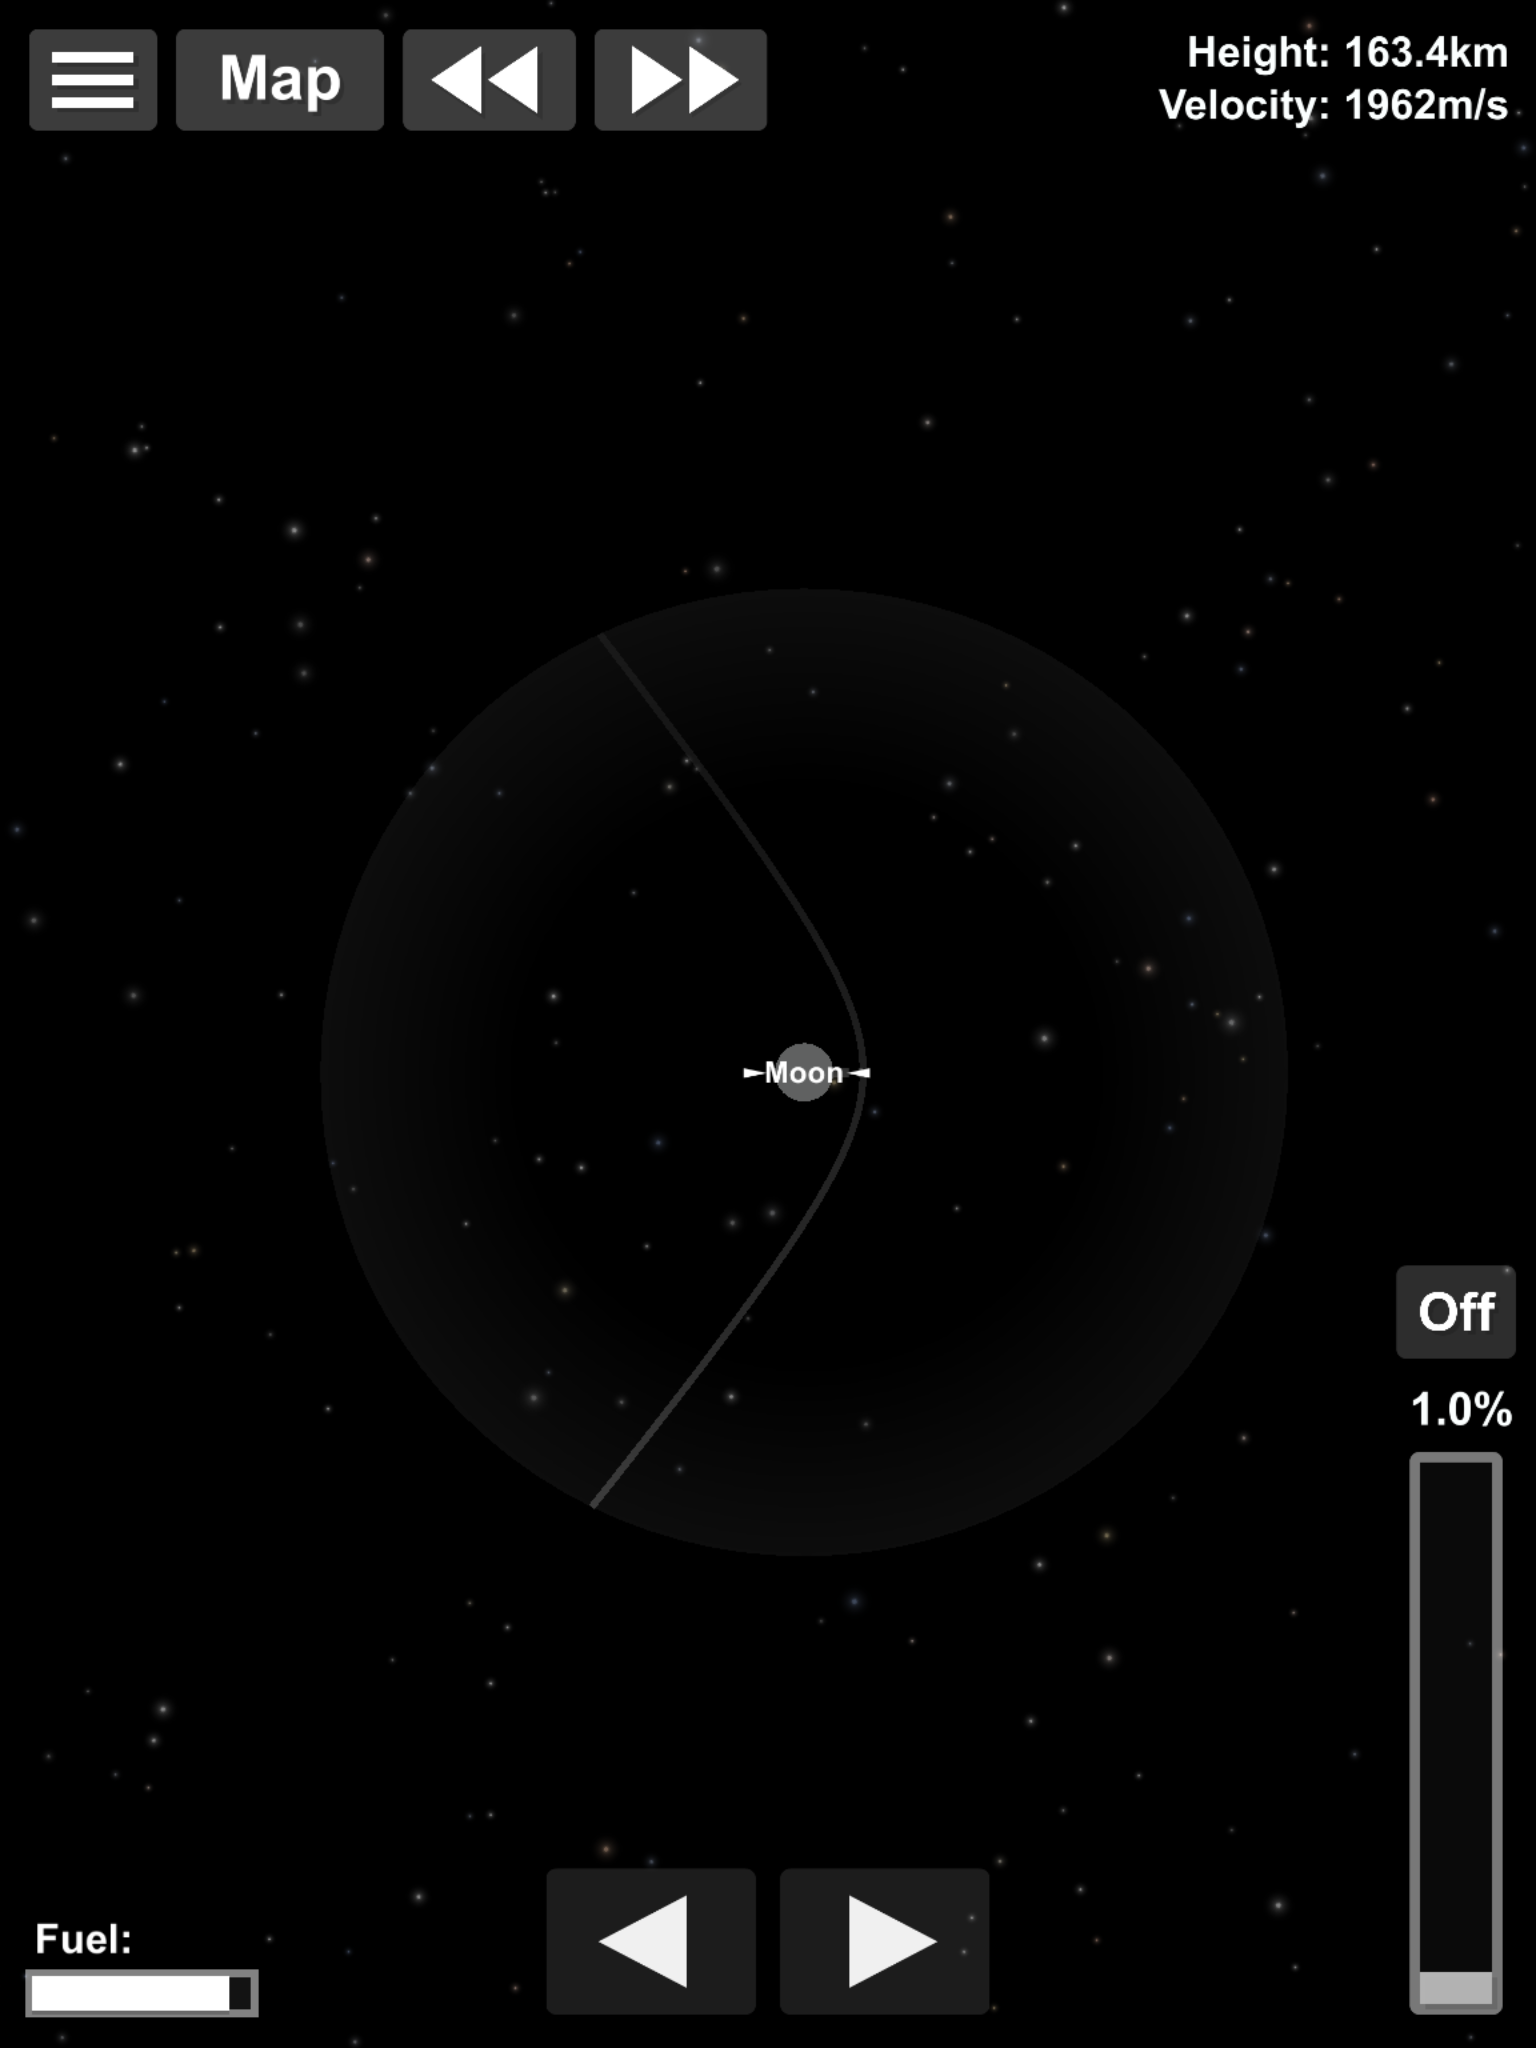
Next, we have to make sure we stay inside the SOI, otherwise we will just get slung straight out. So, we wait til we get to the closest point to the Moon (to take advantage of its own Oberth effect) and burn retrograde until our projected path is inside the moons SOI

Screenshot_2019-03-29-01-24-03.png

Screenshot_2019-03-29-01-25-02.png


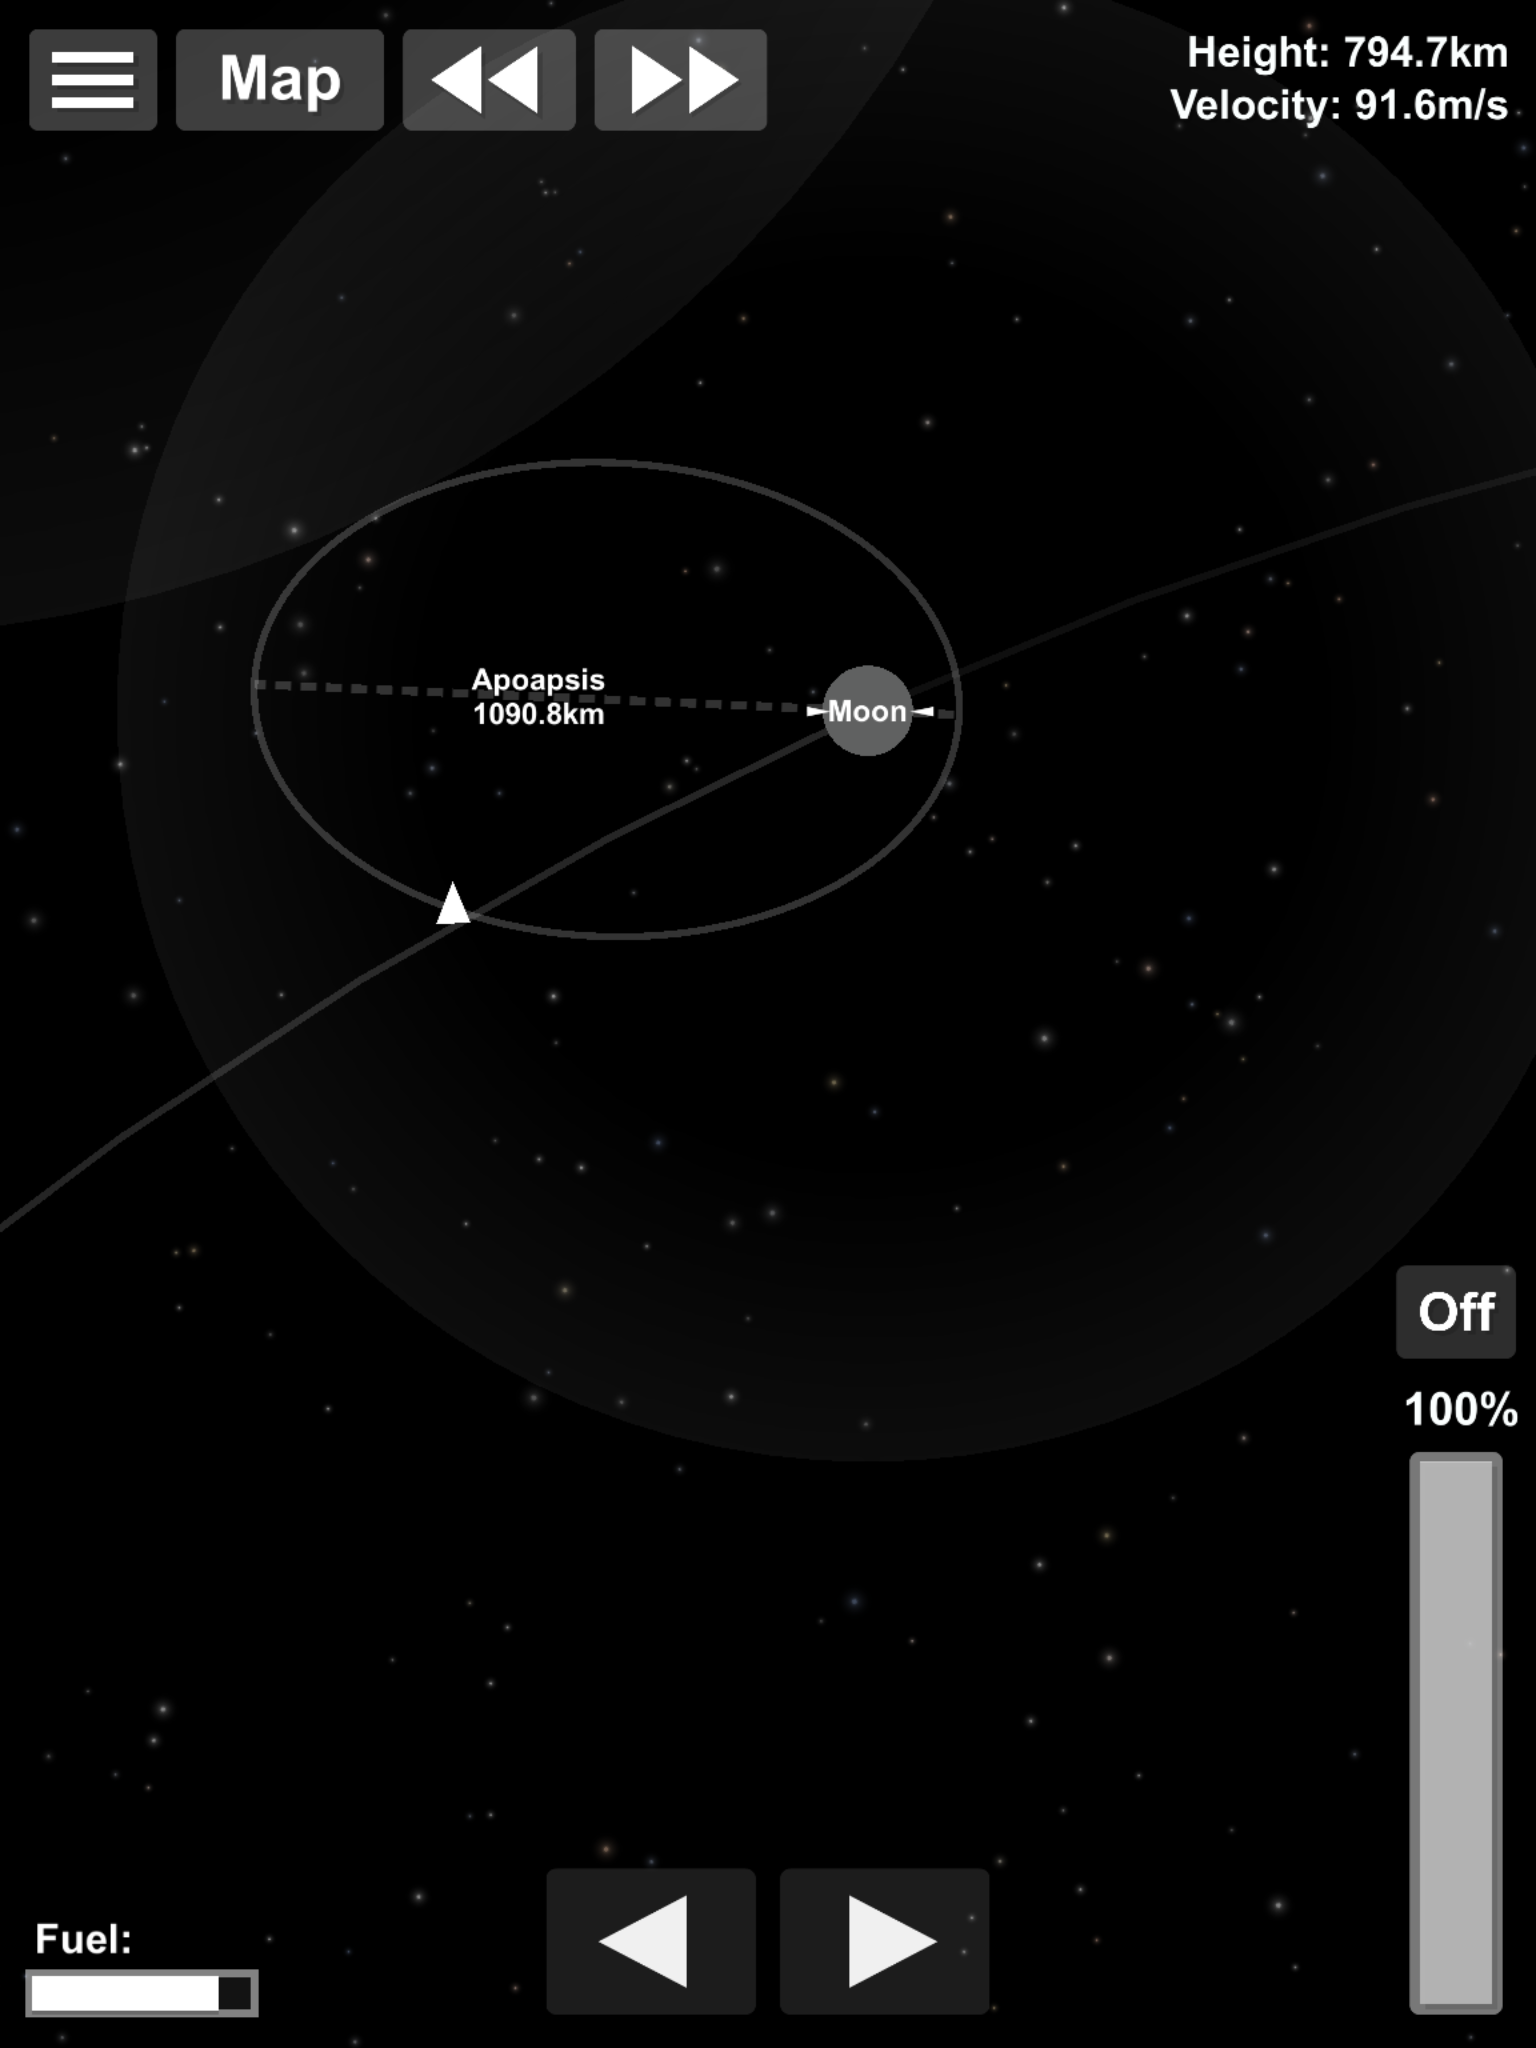
And keep adjusting your orbit using prograde/retrograde burns until you achieve a circular orbit. I've done for apo90/peri76...

Screenshot_2019-03-29-01-30-29.png


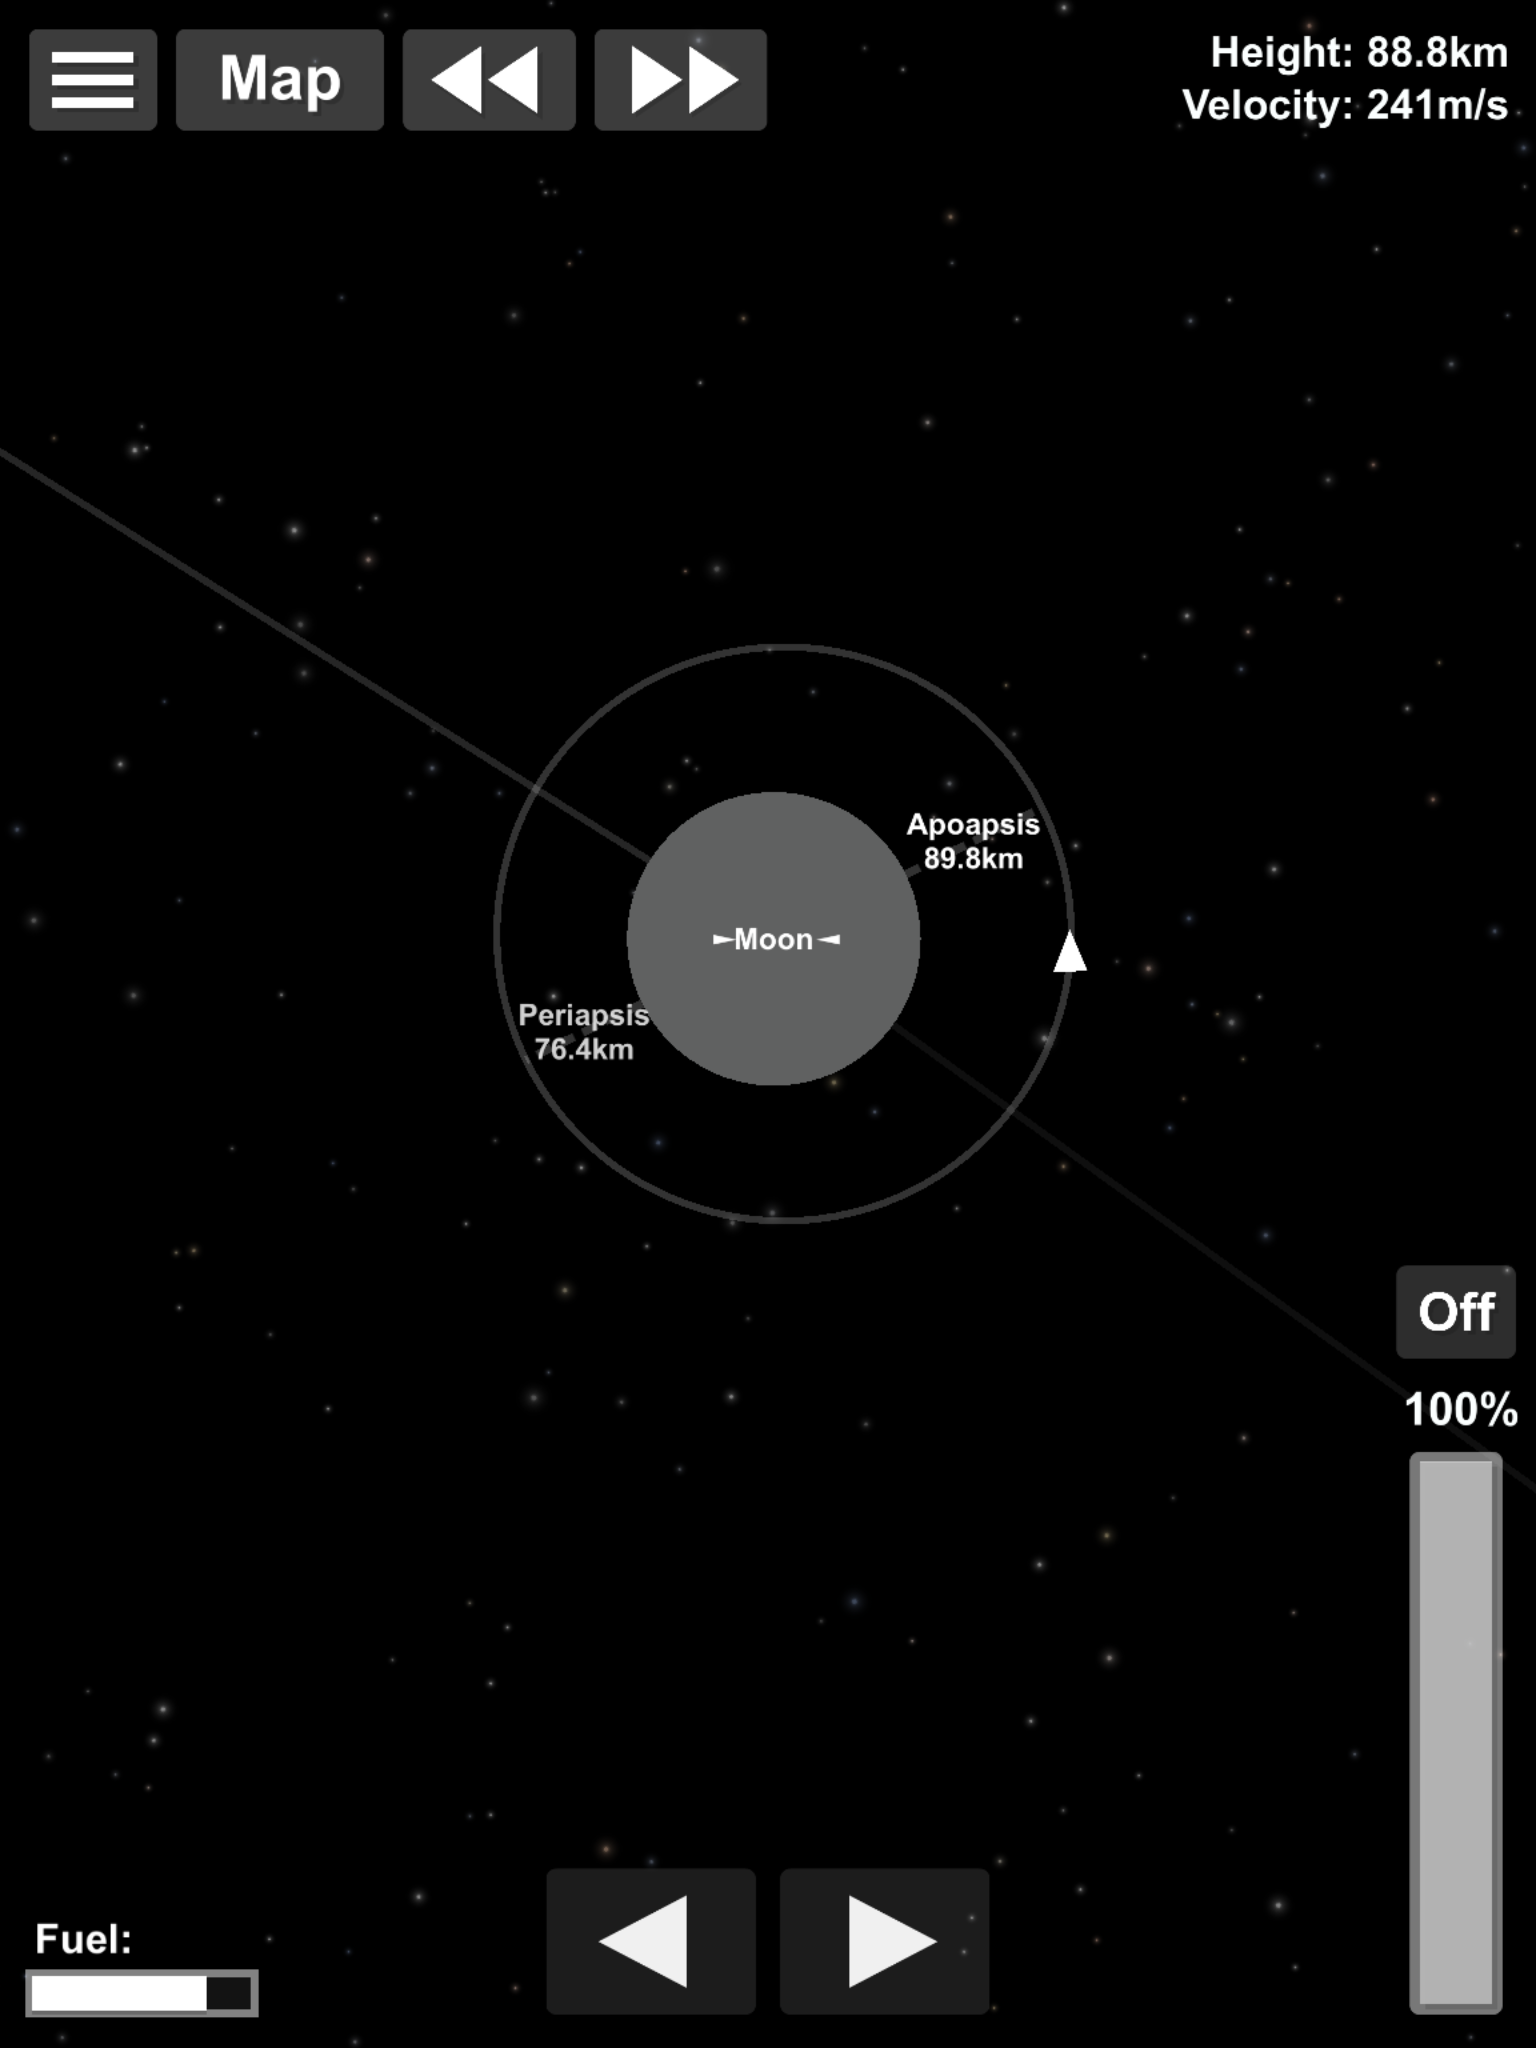
You are now in Low Lunar Orbit (LLO).

Next, landing this sucker.
 

Horus Lupercal

Primarch - Warmaster
Professor
Swingin' on a Star
Deja Vu
Biker Mice from Mars
ET phone home
Floater
Copycat
Registered
#52
To do that, we need to do the opposite to how we created an orbit at take off. We're going to de-orbit the lander by burning retrograde at the apoapsis until we slow down enough that gravity has chance to pull us in to a collision course with the ground.

Screenshot_2019-03-29-01-32-05.png


Then, once we get closer to the ground, we need to scrub off our horizontal speed so that we are just coming in straight down. This just makes landing a lot easier as you only have to think one-dimensional rather than 2 with corrections.

Remember, that the line is our projected path and since there's the atmosphere, it wont change unless we apply force ourselves (there's no drag here, for example). We can use that as an aim point if you want to land in a specific place (like a colonised area) for accuracy.

Screenshot_2019-03-29-01-32-43.png

Screenshot_2019-03-29-01-33-29.png


So, we're now at 6,700m, doing 58.3m/s straight down. That speed will increase at 1.42m/s per second as Lunar gravity drags you down, accelerating you towards the floor.

Screenshot_2019-03-29-01-33-39.png


Press on the landing legs, and they'll unfold, ready for touch down.

For that, we're going to have to burn to slow ourselves down to an acceptable speed to land at. There are a few different techniques to achieve this. One is the Hoverslam.
This is the super cool looking maneuver you have probably seen the SpaceX boosters do when they self recover. Essentially they plummet, in freefall, until the absolute safe moment and then burn hard to slow themselves down for landing. Also known as a suicide burn because if you get it wrong, then you Beresheet yourself all over the place. It takes a bit of experience, trial/error and maths to work out the optimum time to start your burn. The risk obviously is spontaneous disassembly. The reward is it uses the absolute least amount of Dv possible for landing.

Since this is the basics, and i'm still working on the maths for hoverslam landings (coming soon, to a spreadsheet near me), we're going to do a different, safer technique that is less risky, but more expensive fuel-wise.

Essentially, you pick a decent altitude and burn, noting how quickly you decelerate. Then use that as a guess stick as you burn closer and closer to the ground, slowly cutting off speed, then shutting the engines off, falling a bit more, burning again, practically tip-toeing your way out of orbit

Screenshot_2019-03-29-01-34-32.png

Screenshot_2019-03-29-01-34-53.png

Screenshot_2019-03-29-01-35-13.png


You'll notice I've zoomed out to view the surface and can see the terrain below. Also, is your direction arrow. This will give you not just which way you are moving, but also your landing area as it is pointing in your flight direction, relative to the ground. You can adjust this using low throttle burns with the craft orientated slightly left or right, or using RCS if fitted.

Keep doing this softly-softly approach and you should make a decent landing in a rough area of your choice with your lander in one piece.

Screenshot_2019-03-29-01-35-34.png


Welcome to the moon.

One small step/giant leap, and all that good jazz.
 
#53
To do that, we need to do the opposite to how we created an orbit at take off. We're going to de-orbit the lander by burning retrograde at the apoapsis until we slow down enough that gravity has chance to pull us in to a collision course with the ground.

View attachment 17156

Then, once we get closer to the ground, we need to scrub off our horizontal speed so that we are just coming in straight down. This just makes landing a lot easier as you only have to think one-dimensional rather than 2 with corrections.

Remember, that the line is our projected path and since there's the atmosphere, it wont change unless we apply force ourselves (there's no drag here, for example). We can use that as an aim point if you want to land in a specific place (like a colonised area) for accuracy.

View attachment 17157
View attachment 17158

So, we're now at 6,700m, doing 58.3m/s straight down. That speed will increase at 1.42m/s per second as Lunar gravity drags you down, accelerating you towards the floor.

View attachment 17159

Press on the landing legs, and they'll unfold, ready for touch down.

For that, we're going to have to burn to slow ourselves down to an acceptable speed to land at. There are a few different techniques to achieve this. One is the Hoverslam.
This is the super cool looking maneuver you have probably seen the SpaceX boosters do when they self recover. Essentially they plummet, in freefall, until the absolute safe moment and then burn hard to slow themselves down for landing. Also known as a suicide burn because if you get it wrong, then you Beresheet yourself all over the place. It takes a bit of experience, trial/error and maths to work out the optimum time to start your burn. The risk obviously is spontaneous disassembly. The reward is it uses the absolute least amount of Dv possible for landing.

Since this is the basics, and i'm still working on the maths for hoverslam landings (coming soon, to a spreadsheet near me), we're going to do a different, safer technique that is less risky, but more expensive fuel-wise.

Essentially, you pick a decent altitude and burn, noting how quickly you decelerate. Then use that as a guess stick as you burn closer and closer to the ground, slowly cutting off speed, then shutting the engines off, falling a bit more, burning again, practically tip-toeing your way out of orbit

View attachment 17160
View attachment 17161
View attachment 17162

You'll notice I've zoomed out to view the surface and can see the terrain below. Also, is your direction arrow. This will give you not just which way you are moving, but also your landing area as it is pointing in your flight direction, relative to the ground. You can adjust this using low throttle burns with the craft orientated slightly left or right, or using RCS if fitted.

Keep doing this softly-softly approach and you should make a decent landing in a rough area of your choice with your lander in one piece.

View attachment 17163

Welcome to the moon.

One small step/giant leap, and all that good jazz.
this is how horus spends his time
 

Lt. Snakestrike

The Kronian Serpent; Engineering Student
Head Professor
TEAM HAWK
Swingin' on a Star
Atlas
Under Pressure
Registered
#54
To do that, we need to do the opposite to how we created an orbit at take off. We're going to de-orbit the lander by burning retrograde at the apoapsis until we slow down enough that gravity has chance to pull us in to a collision course with the ground.

View attachment 17156

Then, once we get closer to the ground, we need to scrub off our horizontal speed so that we are just coming in straight down. This just makes landing a lot easier as you only have to think one-dimensional rather than 2 with corrections.

Remember, that the line is our projected path and since there's the atmosphere, it wont change unless we apply force ourselves (there's no drag here, for example). We can use that as an aim point if you want to land in a specific place (like a colonised area) for accuracy.

View attachment 17157
View attachment 17158

So, we're now at 6,700m, doing 58.3m/s straight down. That speed will increase at 1.42m/s per second as Lunar gravity drags you down, accelerating you towards the floor.

View attachment 17159

Press on the landing legs, and they'll unfold, ready for touch down.

For that, we're going to have to burn to slow ourselves down to an acceptable speed to land at. There are a few different techniques to achieve this. One is the Hoverslam.
This is the super cool looking maneuver you have probably seen the SpaceX boosters do when they self recover. Essentially they plummet, in freefall, until the absolute safe moment and then burn hard to slow themselves down for landing. Also known as a suicide burn because if you get it wrong, then you Beresheet yourself all over the place. It takes a bit of experience, trial/error and maths to work out the optimum time to start your burn. The risk obviously is spontaneous disassembly. The reward is it uses the absolute least amount of Dv possible for landing.

Since this is the basics, and i'm still working on the maths for hoverslam landings (coming soon, to a spreadsheet near me), we're going to do a different, safer technique that is less risky, but more expensive fuel-wise.

Essentially, you pick a decent altitude and burn, noting how quickly you decelerate. Then use that as a guess stick as you burn closer and closer to the ground, slowly cutting off speed, then shutting the engines off, falling a bit more, burning again, practically tip-toeing your way out of orbit

View attachment 17160
View attachment 17161
View attachment 17162

You'll notice I've zoomed out to view the surface and can see the terrain below. Also, is your direction arrow. This will give you not just which way you are moving, but also your landing area as it is pointing in your flight direction, relative to the ground. You can adjust this using low throttle burns with the craft orientated slightly left or right, or using RCS if fitted.

Keep doing this softly-softly approach and you should make a decent landing in a rough area of your choice with your lander in one piece.

View attachment 17163

Welcome to the moon.

One small step/giant leap, and all that good jazz.
One note is that, once you get used to it, it's so much easier to slow down for landing if you do it from map view until only about 200-100m high. Made suicide burns so much easier for me.
 

Horus Lupercal

Primarch - Warmaster
Professor
Swingin' on a Star
Deja Vu
Biker Mice from Mars
ET phone home
Floater
Copycat
Registered
#55
Right, so we've made moon landing, we've played some golf, collected rocks and taken a few selfies, but we need to leave before the resident car park attendant from the SE tries charging us for being in on a celestial body he has no legal claim over.

Because we worked out the numbers at build, even at full tanks the grasshopper engine has more than enough shunt to get us off the ground. Also because there's no atmosphere here and very little gravity, we don't have to climb to 30,000metres to achieve orbit.

In this instance, I've got the legs folding as I leave the ground (not a requirement) and turning over to quite an angle almost straight away to an apogee at 5,000m.

Screenshot_2019-03-29-01-36-43.png

Screenshot_2019-03-29-01-37-00.png


Once i'm at the apogee, its a hard burn to generate an orbit in the exact same way as we did at the Karman line on Earth, in this instance at 5km above the lunar surface. This can literally be as low as you like, but remember that you are technically supersonic at LLO and if you're too low then you may spank into a terrain feature.

Screenshot_2019-03-29-01-38-44.png


Then, we select Earth as target in the same way as before and a transfer window indicator doth appear before thine eyes. Once inside that window, burn prograde until that orbit grows out of the SOI

Screenshot_2019-03-29-01-39-29.png


And then all the way back to a potential Earth orbit

Screenshot_2019-03-29-01-39-52.png


That done, time warp until you are at the periapsis and then burn retrograde until you are in a neat 150km orbit, back in LEO

Screenshot_2019-03-29-01-40-50.png

Screenshot_2019-03-29-01-43-25.png


Oh cock. We've run out of fuel...

This is because, remember when we were designing and planning this mission, when we worked out the total Dv generated against the projected cost requirements, we didn't have enough? Proof pudding, right there.

So what are we going to do?

Cheat a little. And use a technique known as aerobraking.
 

Horus Lupercal

Primarch - Warmaster
Professor
Swingin' on a Star
Deja Vu
Biker Mice from Mars
ET phone home
Floater
Copycat
Registered
#56
this is how horus spends his time
Ha, I've work in 7 hours, supposed to be packing/revising/sleeping for a 2 week instructors course.

Ooooor, I could be watching the last episode of the Grand Tour and making this...

One note is that, once you get used to it, it's so much easier to slow down for landing if you do it from map view until only about 200-100m high. Made suicide burns so much easier for me.
Aye, whichever works. I like seeing the ground earlier so I can adjust the LZ early enough so i'm out of map mode as soon as I can see both it and the lander.
 

Lt. Snakestrike

The Kronian Serpent; Engineering Student
Head Professor
TEAM HAWK
Swingin' on a Star
Atlas
Under Pressure
Registered
#58
Ha, I've work in 7 hours, supposed to be packing/revising/sleeping for a 2 week instructors course.

Ooooor, I could be watching the last episode of the Grand Tour and making this...


Aye, whichever works. I like seeing the ground earlier so I can adjust the LZ early enough so i'm out of map mode as soon as I can see both it and the lander.
Yeah, makes sense. I usually don't do that 'cause I can't see the velocity very well zoomed out, and that kinda matters on earth. When aiming for the landing pad I do a little from zoomed out view though, same reason you do that. Earth's gravity kinda makes things challenging though.
 

Horus Lupercal

Primarch - Warmaster
Professor
Swingin' on a Star
Deja Vu
Biker Mice from Mars
ET phone home
Floater
Copycat
Registered
#59
Aerobraking. It isn't a dark art, though there isn't any hard and fast data on the where and how you do certain things. It is very much depending on factors like
  • atmosphere density
  • entry speed
  • entry angle
  • entry altitude
  • total drag of your rocket. Which can be affected by all sorts of things on your build and configuration. Again, His Holiness the Space Stig (Whom some say can tell you the TWR of a rocket by scent, and works out his BMI using kN) has a piece on part aerodynamics here.
So, what we're going to do is Prince of Persia our rocket back to where it was still at Luna and when we set up the return flight, adjust the periapsis so it is inside the atmosphere of Earth

Screenshot_2019-03-29-01-43-56.png


What will happen now, is that when your rocket screams into the upper atmosphere at just shy of 5,000mph (instead of bouncing off or exploding, like it would do in real life), drag will act on the rocket and slow it down for you, rather than burning fuel retrograde like we did before, giving us as Altaïr puts it 'free Dv'.

Screenshot_2019-03-29-01-44-43.png


Even if we don't get enough of an aerobrake the first time, because of the magic of science, we will always return to the last place in an orbit we applied a force to it (i.e. this spot in the atmosphere) and can keep hitting it over and over again until it slows your speed down to the desired orbital apoapsis you require.

Or in this case, a meeting with the ground.

Screenshot_2019-03-29-01-47-12.png


As you can see comparing speeds, we've dropped 540m/s, and didn't burn a drop of fuel. And as we come around again, its dropping our periapsis down so much that it is joining the ground. We are now ballistic, at terminal velocity.

Now, anyone that has been in freefall, or watched Felix fall from the upper atmosphere, knows that terminal is a sliding scale depending on air density, weight, body position, clothes and can range from breaking the sound barrier to just over 100mph (mine was about 120-130, depending on what i was wearing).

Because we are terminal, we aren't going to accelerate as we approach the ground, despite gravity and it's best efforts. Our drag is equal to its pull at the moment. And as we fall lower, the air will get thicker and we will continue to decelerate. Burning now is pointless, because as soon as we stop the burn, we will accelerate until drag equals gravity again. Better to let the atmosphere do the work for us for the moment

Screenshot_2019-03-29-01-48-19.png

Screenshot_2019-03-29-01-48-34.png


And there's the evidence.
  • 20.7 km = 1699m/s
  • 12.9 km = 832m/s
  • 10.1 km = 521m/s
Again, we've not touched any fuel since we left Lunar SOI here, so all this deceleration is for free.

Then we get onto the final trick in our sleeve. Parachutes.
As you can see in the picture, you can't just pop them whenever you like. You have to be under 2,500 metres (an issue on a certain area of Mars) but Earth isn't a problem generally. But, because we're still supersonic, 10,000 metres up, it won't let us yet.

Screenshot_2019-03-29-01-49-08.png


Once we pass that magic line at 2,500m, it'll allow us to use them. Press once on the parachute and it'll bang out and half deploy.

Screenshot_2019-03-29-01-49-25.png


Don't worry yet about the half deployment. We've got loads of time before we get to the floor anyway.

This will now slow our descent to roughly 18m/s. Again, no fuel has been touched, and we've come from 2240m/s.

It won't let us fully deploy the canopy until we're below 500m. Mostly because it slows us down to 5.3m/s and it takes an age to get down from there at that speed. I'm not bothering until I get below 250m because I like to live dangerously

Screenshot_2019-03-29-01-51-09.png


Then it's a simple case of waiting for the ground to come up, keep your feet and knees together, don't reach for the ground and remember to grab the grass, cos its the bounce that kills.

Feet make contact with the ground...NOW...

Screenshot_2019-03-29-01-51-58.png


Body comes to rest...NOW...

Screenshot_2019-03-29-01-52-08.png


Its just a simple case now of recovering your mission, getting your mission summary and receiving the adulation of millions of fans around the world with book deals, films and maybe a series on Netflix.

To do this, switch to map view, press on your triangle

Screenshot_2019-03-29-01-52-14.png


Press Recover

Screenshot_2019-03-29-01-52-19.png


And then Complete Mission.

And just for giggles, we've landed with 16% fuel on board.

Thats:-
  • 36 seconds of burn time
  • 448.97 m/s Dv
  • TWR 1.16
Which is plenty enough if you wanted a controlled, powered descent onto the launchpad.

Not bad considering we technically ran out of juice 150km above the Earth...
 

Attachments

Horus Lupercal

Primarch - Warmaster
Professor
Swingin' on a Star
Deja Vu
Biker Mice from Mars
ET phone home
Floater
Copycat
Registered
#60
Mission 3: Space Station Core + H. Payload Drone

For the final mission, it's going hard.
Because we completed the last mission, loading the game requires to go onto create new rocket from the main screen. No hassle, because we have a new toy to play with.

Flight profile wise, we're using the same as the previous 2 missions, so again I'm just going to concentrate on the specific lessons of this flight.
  • Multi-engine ignition and staging
  • Fuel gauges
  • Booster separation
Load the 3rd mission blueprint, give it the quick look over to make sure you've not missed anything (docking ports are a usual suspect here) and then launch as before.

Screenshot_2019-04-08-14-30-26.png


Cos this is multi-engine, make sure all the engines are activated before you press go. If you don't, best case is it won't lift off the ground. Worse case is one of the boosters will shut off before the otherside, the unequal thrust will send it into a flat spin and anyone that has seen Top Gun knows how that turns out. talk to me goose

Once you're content, get the fire burning and enjoy the sound of 11,240kN of thrust punching a hole in the sky.

Screenshot_2019-04-08-14-30-46.png

Screenshot_2019-04-08-14-30-53.png


Remember those fuel gauges we spoke about waaaay back when? If you look at them now, you see 3 of them are starting to deplete as we lift off. 2 of them are equal, with the third just behind. The one by itself is the stage one core fuel tank level. The other 2 are your boosters. We need to keep an eye on these as we climb, as they'll be the first things we need to get rid of, and every second they are attached and not burning, they are dead weight and an aerodynamic hinderance.

As the booster gauges start getting low (roughly 10%), start zooming in to the rocket so you can press the side separators and they should fall away as you continue climbing.

After 75.6 seconds you should see this:
Screenshot_2019-04-08-14-32-02.png


Press the side separators...

Screenshot_2019-04-08-14-34-04.png


And they fall away to land in someones back garden or whatever.

What may happen, especially with bigger boosters, is rather than roll outwards and way like they should, instead they either roll inwards or don't move away at all, make contact with the core and kill it out of sheer spite. Or, the game will think you love the empty, useless boosters enough that you want to follow them down, rather than the still burning to orbit with a payload launch vehicle. The former problem is so bad that my larger boosters don't use traditional separators and I have sideways mounted engines to blast them away from each other that I light up just before separation and line the inside with sacrificial armour just in case.

Then at 125.7 seconds after launch, the core will turn off. Turn off the engines at the button, separate the empty stage, select all 3 frontiers of stage 2 and then turn on your engines. Again, the quicker you do this the better as you're still in atmosphere and will be decelerating.

Screenshot_2019-04-08-14-38-16.png
Screenshot_2019-04-08-14-38-23.png


And carry on climbing to orbit. Once you're out into the void, punch off the fairings and establish a good LEO at roughly 100km

Screenshot_2019-04-09-08-46-33.png

Screenshot_2019-04-09-08-47-11.png


Now, we're at a good height for a space station. It's far enough up for several layers of parking orbits below you but also close enough to the planet to reduce the amount of effort required to send things up or de-orbit them.

On that, we disconnect the L/V and leave the core and drone as they are, ready for the next sections to come up.

Screenshot_2019-04-09-08-47-27.png

Screenshot_2019-04-09-08-47-46.png
 

Altaïr

Space Stig, Master of gravity
Staff member
Head Moderator
Team Kolibri
Modder
TEAM HAWK
Atlas
Deja Vu
Under Pressure
Forum Legend
#62
Horus Lupercal what do you think is the best launch method:

Boosters, First Stage, Second Stage
-or-
First Stage (no Boosters), Second Stage, Third Stage.
Let's see what Horus Lupercal thinks, but here is my opinion.

When you have a rocket non-assisted by boosters, the main disadvantage is that your first stage must be powerful enough to lift the whole launcher. But on the other hand, after it has finished burning, the remaining stages have their fuel reserve unchanged.

With boosters, you provide an assistance to your first stage. Actually in this case the first stage is rather designed as a second stage as it will fly way higher (that's how it's done on Ariane 5, Ariane 6 too, or the shuttle). You don't need as much thrust, because the main engine helps, but after booster separation you already consumed some fuel from the first stage.

Ingame, I personally like to use boosters with a fuel reserve on the top. During the booster phase, the fuel reserve is transferred to the core, so that it's still at 100% (or close) when the boosters end burning. That's quite similar to what the russians wanted to do with the Buran: the main engine could burn the fuel from the boosters (theirs used liquid fuel). 8bitCosmonaut may tell you more about that though.

Now both strategies (powerful 1st stage/boosters) are valid. In real life, the booster configuration has advantages in terms of modularity though: you have a core which is your base rocket, and if you want a more powerful rocket, you can add as much boosters as desired. That's the purpose of rocket families: Angara, Delta IV...
 

Horus Lupercal

Primarch - Warmaster
Professor
Swingin' on a Star
Deja Vu
Biker Mice from Mars
ET phone home
Floater
Copycat
Registered
#63
Horus Lupercal what do you think is the best launch method:

Boosters, First Stage, Second Stage
-or-
First Stage (no Boosters), Second Stage, Third Stage.
Let's see what Horus Lupercal thinks, but here is my opinion.

When you have a rocket non-assisted by boosters, the main disadvantage is that your first stage must be powerful enough to lift the whole launcher. But on the other hand, after it has finished burning, the remaining stages have their fuel reserve unchanged.

With boosters, you provide an assistance to your first stage. Actually in this case the first stage is rather designed as a second stage as it will fly way higher (that's how it's done on Ariane 5, Ariane 6 too, or the shuttle). You don't need as much thrust, because the main engine helps, but after booster separation you already consumed some fuel from the first stage.

Ingame, I personally like to use boosters with a fuel reserve on the top. During the booster phase, the fuel reserve is transferred to the core, so that it's still at 100% (or close) when the boosters end burning. That's quite similar to what the russians wanted to do with the Buran: the main engine could burn the fuel from the boosters (theirs used liquid fuel). 8bitCosmonaut may tell you more about that though.

Now both strategies (powerful 1st stage/boosters) are valid. In real life, the booster configuration has advantages in terms of modularity though: you have a core which is your base rocket, and if you want a more powerful rocket, you can add as much boosters as desired. That's the purpose of rocket families: Angara, Delta IV...

All of what Altaïr said...

BLUF, best overall is Boosters + Stage one - Stage one - Stage 2 etc etc. If you burn the boosters solo, they essentially are stage one.
Numbers wise, the more you can throw away whilst burning, the better your Dv/TWR will be as your overall mass keeps dropping as well as what you're burning fuel-wise. I've personally not done the 'booster with a reserve tank on top', but it'd have clear advantages of not just having a full-ish stage one, but a smaller core tank as well.
Things to bear in mind though for the more thirsty rockets that the fuel transfer in-game is 'only' 1 ton per second (worked out for some work on external tanks for a shuttle I've built) and you can only do one tank at a time. 3 Frontiers or even a single Titan at full throttle is more than that so you'll be fighting a losing battle to keep the core tanks full from launch.

To maximise everything, you should time your booster burn out to coincide with pretty much the time where your stage one TWR is enough to carry on without them. Once you figure out how long that booster time is, add that amount of fuel in tons on top as the 'reserve' Altair mentions and transfer that to the core in flight. Remember to account for the full core weight when you're working out the TWR when it goes solo. That way then when you separate them, you're getting rid of the unneeded engine weight, the booster tank weight and the weight of the reserve tanks which aren't going to take up mass on the core tanks calculations.

They can have a detrimental effect though if they are too big and last as long (or longer) than the first stage. My Ark II is going to need an over-haul at some point because the boosters are enormous and burn through stage one and half of 2 as well and i suspect they're doing more harm than good at the upper end of the flight.
 
#66
Ingame, I personally like to use boosters with a fuel reserve on the top. During the booster phase, the fuel reserve is transferred to the core, so that it's still at 100% (or close) when the boosters end burning. That's quite similar to what the russians wanted to do with the Buran: the main engine could burn the fuel from the boosters (theirs used liquid fuel). @8bitCosmonaut may tell you more about that though.
The Buran-Energia rocket never used such fuel transfer methods, the boosters uses kerosene fuel while the core uses hydrogen fuel, mixing these together would be catastrophic. The only concept for fuel transfer from booster to core in Soviet rocketry is the UR-700 designed by Chelomi.
 

Pink

(Mooncrasher)
Staff member
Team Valiant
Discord Staff
Voyager Quest
Man on the Moon
Forum Legend
#69
Russians and Americans designate stage numbers differently, I hear.
 

Altaïr

Space Stig, Master of gravity
Staff member
Head Moderator
Team Kolibri
Modder
TEAM HAWK
Atlas
Deja Vu
Under Pressure
Forum Legend
#71
The Buran-Energia rocket never used such fuel transfer methods, the boosters uses kerosene fuel while the core uses hydrogen fuel, mixing these together would be catastrophic. The only concept for fuel transfer from booster to core in Soviet rocketry is the UR-700 designed by Chelomi.
Ok, I thought so. Yes I know the main core and the boosters used different fuel, but I thought it was a tripropellant engine designed for this. After a quick search, I realized I probably confused with the RD-701, designed for the MAKS project:
https://en.m.wikipedia.org/wiki/RD-701
Thanks for the info anyway.

Silly and complicated, you might as well design the boosters to use the same fuel as the core stage, and increase the booster's tank volume.
Well, complicated I agree, silly it depends...
Personally I do this, but that's when I use Frontier engines for the central core, while my boosters use Titans. That's a small optimization as you can jettison a few more empty fuel tanks when getting rid off the boosters.
But obviously, if your first stage uses Titans, then it's simpler to do what you say: basically a massive first stage.
 

Blazer Ayanami

Space Shuttle enthusiast // Retired Admin
Registered
Forum Legend
#72
Nah, I just found Blazer's logic strange.
Is not the same.

If you count the Boosters as Stage 1, the core as Stage 2, and the upper Stage as 3, this means you liftoff with stages 1 and 2 on, and get rid of Stage 1 with Stage 2 almost dry.

While in the other configuration, you liftoff with Stage 1, and when you drop it, your stages 2 and 3 are still full, like Altaïr said.
 

Horus Lupercal

Primarch - Warmaster
Professor
Swingin' on a Star
Deja Vu
Biker Mice from Mars
ET phone home
Floater
Copycat
Registered
#73
The booster IS the first stage. You might as well call the Space Shuttle a fucking SSTO.
Nah, I just found Blazer's logic strange.
Is not the same.

If you count the Boosters as Stage 1, the core as Stage 2, and the upper Stage as 3, this means you liftoff with stages 1 and 2 on, and get rid of Stage 1 with Stage 2 almost dry.

While in the other configuration, you liftoff with Stage 1, and when you drop it, your stages 2 and 3 are still full, like Altaïr said.
What Cosmo means is how you are labeling the stages. if you're burning the boosters and the bottom part of the core at the same time, then the core is stage one and the boosters are just the boosters, especially if they dry out at different times. If you're burning the boosters first, then turn on the bottom core after they go out, then it's booster stage one, core stage 2.
 

Blazer Ayanami

Space Shuttle enthusiast // Retired Admin
Registered
Forum Legend
#74
That's exactly what
What Cosmo means is how you are labeling the stages. if you're burning the boosters and the bottom part of the core at the same time, then the core is stage one and the boosters are just the boosters, especially if they dry out at different times. If you're burning the boosters first, then turn on the bottom core after they go out, then it's booster stage one, core stage 2.
I meant. I don't count Boosters as Stage, like you said, they are just first stage's Boosters, they are not a different Stage.
 
#75
Is not the same.

If you count the Boosters as Stage 1, the core as Stage 2, and the upper Stage as 3, this means you liftoff with stages 1 and 2 on, and get rid of Stage 1 with Stage 2 almost dry.

While in the other configuration, you liftoff with Stage 1, and when you drop it, your stages 2 and 3 are still full, like Altaïr said.
Do you need me to speak Spanish? I said the boosters is the first stage, that means the core and boosters are together, and joked that you might as well call the Space Shuttle an SSTO.